Store bought windows are, for the most part, expensive and poorly made. There's very little selection, too, when it comes to tudor windows. The good news is, with a little patience, and minimal investment in materials, you can make your own. For my windows, I generally use basswood, which is available at any hobby shop, and online.
First, find some inspiration. I like to troll the internet for pictures. A good selection of pictures can be found here. Keep in mind, too, that much of what we think of as "tudor" isn't actually English at all. Rather, many of the most popular forms--particularly those that've found their way into fantasy literature, and film--are Bavarian in origin.

This is one of my favorite tudor windows.
The next step is to measure--carefully. I usually try to design my windows, doors, and other architectural elements around readily available components. It's a lot easier to cut a piece of wood a different length, than to special order a laser cut window grille. In this case, I designed my window around these window mullions:

They're available from Laser Tech Miniatures, as well as numerous other retailers. Yes, they're made for a victorian window, but so what? If you use a little imagination, and think outside the box, it's amazing how much more is out there.

I started by building a frame around two prefab window mullions, using basswood strips. I left a little gap (about 1/32") between the mullions and the frame, to account for the added mass of paint. Later on, I'll stain the wood a chestnut color, and spray paint the mullions with flat black paint, to simulate leading--but that's Part II.
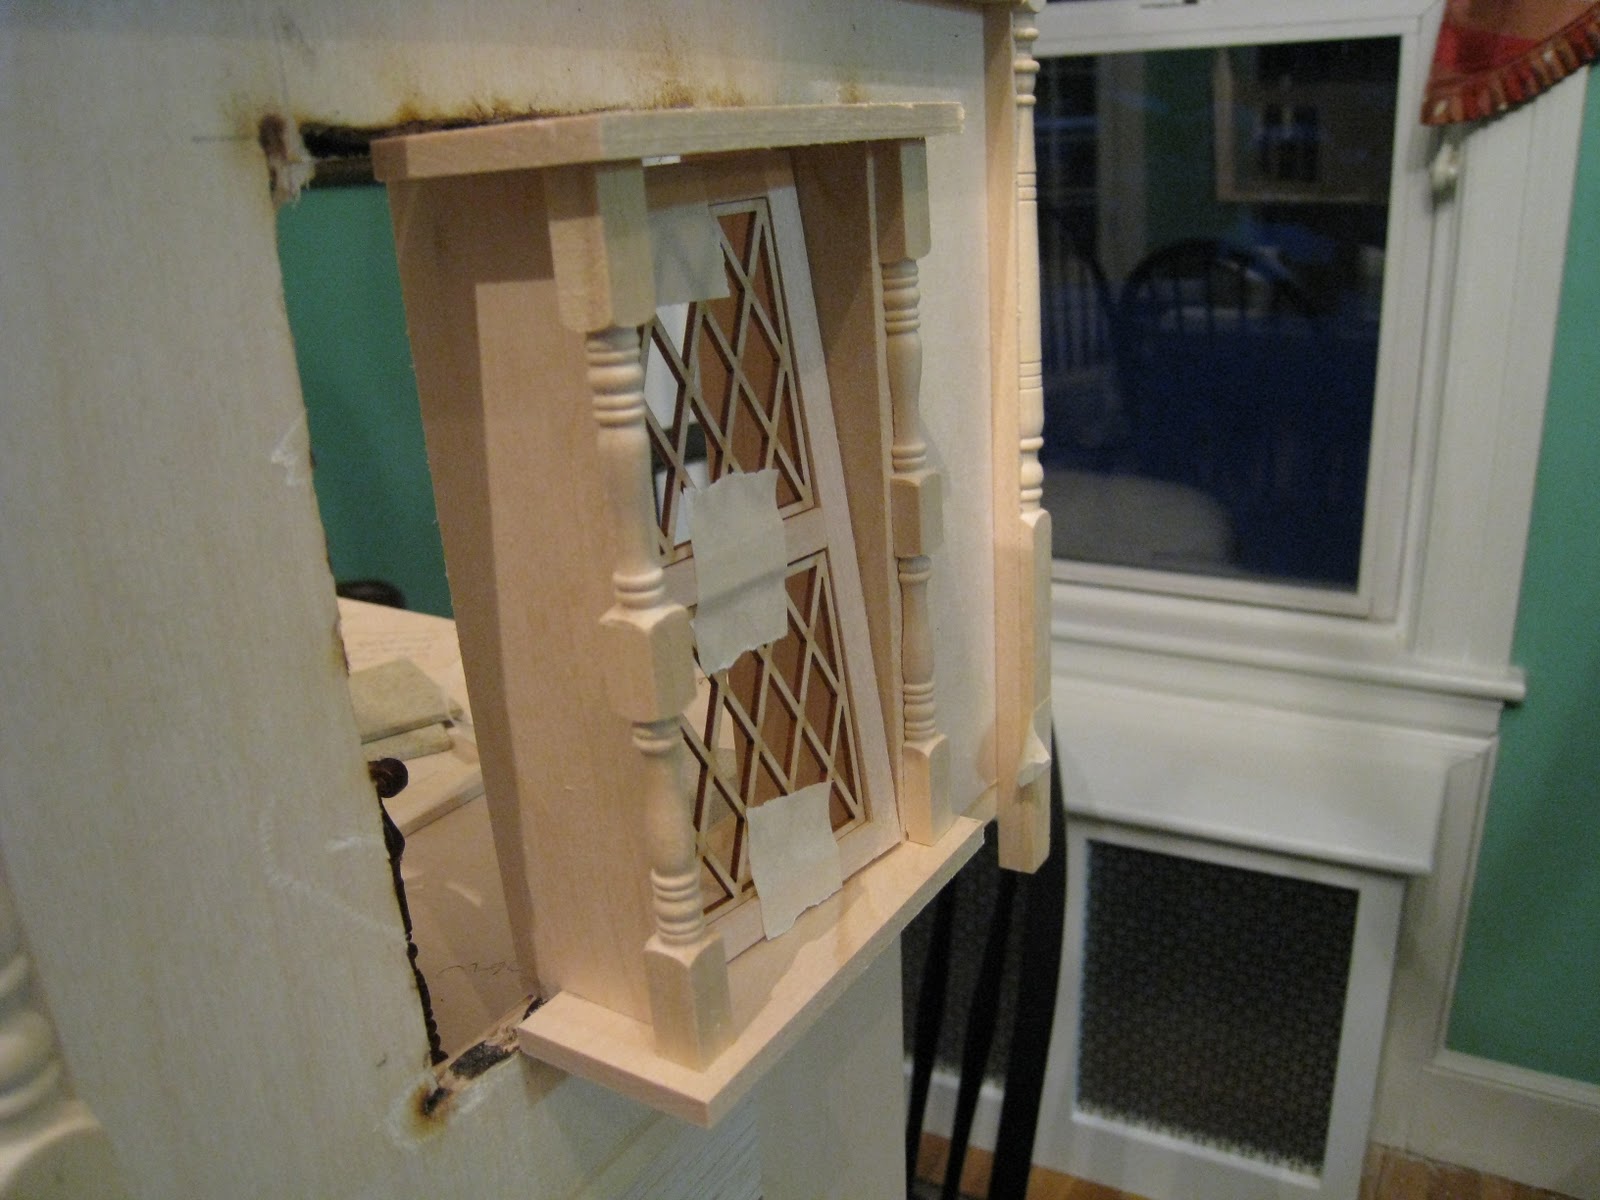
The next step was basically building a box around the frame. Your exact measurements will differ, depending on the overall dimensions of your dollhouse. Here, I left a little overhang on both top and bottom. And, if you're wondering how I got those carved posts...

Recognize these? I married two newel posts by cutting off the ends and gluing them together, and then, after the glue dried, I used my table saw to cut a small channel out of the back. Note, here, that this is a DANGEROUS thing to do, as it requires your fingers to be in very close proximity to the saw. Don't try this at home, and all that. Seriously, though, any time you're using a table saw, be VERY careful, and observe every proper safety precaution.

A view from the back. The channel I cut was a small one--about 1/4". Remember to lower the table saw blade, otherwise you'll just end up slicing the newel posts in half.
Note, here, also, that the front overhang doesn't extend all the way back. If it did, you wouldn't be able to fit the window into the window opening. Rather, the front overhang should lie flush against the exterior wall, while the rest of the box extends all the way into the room.

Compare the inside of the box, with the front overhang.

It's important, when you're designing a window, to visualize how it'll fit into the dollhouse itself.

I periodically dry fit windows, etc into place, to make sure I like how they're coming out. Note, here, that the window hole I originally cut is larger than the window I ultimately decided to make. Don't let the size of the window holes in your dollhouse kit restrict you; you can always either make them larger, or use strips of basswood, or even balsa wood, to shrink them.
Most commercially available dollhouses have absolutely enormous window holes that are really too large for a medieval or tudor dollhouse. They're meant to fit commercially available windows, which are, by and large, of the American victorian style. Sometimes, smaller is better.

A close-up view.
Another close-up view. Sometimes it takes a little wiggling to decide where, exactly, you want your window to sit. Also, seeing it in place like this helps me to decide what extra trim I want to add.

I added a skirt using commercially available 1:12 scale dentil trim.

It sits flush with the exterior wall.

I added a small piece of wood to create a sturdy bottom. In real life, the dentil trim would've disguised a morticed support, keeping the window up--and its occupant from falling out! But, you can certainly add any kind of supports (corbels, brackets, etc) you like.

An aerial view of the back of the window.

A close-up of the completed bottom support.
With a window like this, the challenge is the design. I find that, when I make windows for a house, the first window takes about five times as long as all the other windows combined. I like to spend a lot of time measuring, dry fitting, etc to make sure everything's completely perfect. Then, for the rest of the windows, I essentially copy what I have. Small variations on a theme--remember, tudor houses tend not to be homogenous--are desirable, and fairly easy to achieve with a little practice.
In Part II of this tutorial, I'll show you how to finish and install the window.
7 comments:
This would be a good guide for an actual window replacement. Tudor windows are one of the best classic designs for a house or building, perhaps because of its detailed trim. Most people think of tudor windows as English 'coz of the Victorian era when houses were designed to have those types of windows. Anyways, you did a pretty good job on that dollhouse. Have you finished it already?
Homeowners have many different reasons for window replacement. Some are simply looking to improve their view from both inside and out of their house. A window replacement job can enhance the interior and exterior beauty of any house by freshening up its look and updating its style. Window replacement can significantly enhance the look of a house and give it added curb appeal. On the inside of your home, window replacement can let more natural light, can add to the décor of any room, and improve the view of the outside. It's amazing how much an upgrade can enhance the view of your own yard or neighborhood.
Windows New Hampshire
I truly like to reading your post. Thank you so much for taking the time to share such a nice information.
Casement windows are the second most energy-efficient, after fixed-pane windows. The window sash presses against the frame on closing, creating an airtight seal. This helps prevent air entry and leakage.
Conveniently this page might certainly likely get well recognized associating countless personal blogs human beings, ready for its painstaking articles or blog posts or simply experiences. fensterversand
I really like the information provided in this article and I really like the way you have explained each and everything so well. Very well done with the article, hope that you will continue to do posting
Casement and Awning Windows
Thanks for posting the useful information to my vision. This is excellent information
Awesome,
upvc casement windows dealers
upvc casement windows dealers hyderabad
Post a Comment