Most so-called "stained glass" for dollhouse miniature applications is complete rubbish.
For a very minimal investment, you can make your own.
You will need:
- Lead golf tape (for more on where to buy this, and other supplies you'll need, check here)
- Either a pre-made window, or one you've made yourself.
- If you're making your own window, as I've done here, you'll need to purchase some plexiglass. I've used 0.03 mm plexiglass, which is thick enough to be substantive, but thin enough to cut with a craft knife. I purchased mine on Amazon.
- Bombay India ink. If you want to replicate the look I've created here, you'll need blue, violet, cherry red and teal ink.
- Deco-Art Triple Thick Brush-On Glaze.
- One or more very fine brushes.
- A craft knife (and many replacement blades!)
- A metal ruler.
- A polymer clay stylus.
I apologize to those of you who've been waiting for this tutorial. I know it's taken a long time. If you're new to the blog, please check out my first glass tutorial here. I explain how to make a diamond paned window. A stained glass window is slightly more challenging but, believe it or not, not much more! The most challenging aspect of this project is curving the lead tape to create your design. With a little practice, though, it gets much easier. This was my first stained glass window, and I must say, the learning curve is very steep. Don't be intimidated by the idea of creating stained glass!

First, finish your actual window. Once you've inserted the glass, you really won't be able to. Then, if you're using a window you've made yourself, cut a piece of plexiglass exactly the right size to fit in. The fit should be snug, but not so tight that the plastic warps or bends. If you need to, glue it in place with some very tiny drops of epoxy. During the course of leading this window, my plexiglass shifted around a tiny bit, but I just pushed it back in place and continued on.

Then, cut your pattern to fit, and tape it in place. I found this pattern on the internet. I copied and pasted it into a Word document, then shrunk it to size. I used painter's tape to fix it in place.

Make sure your design is taped in place securely.

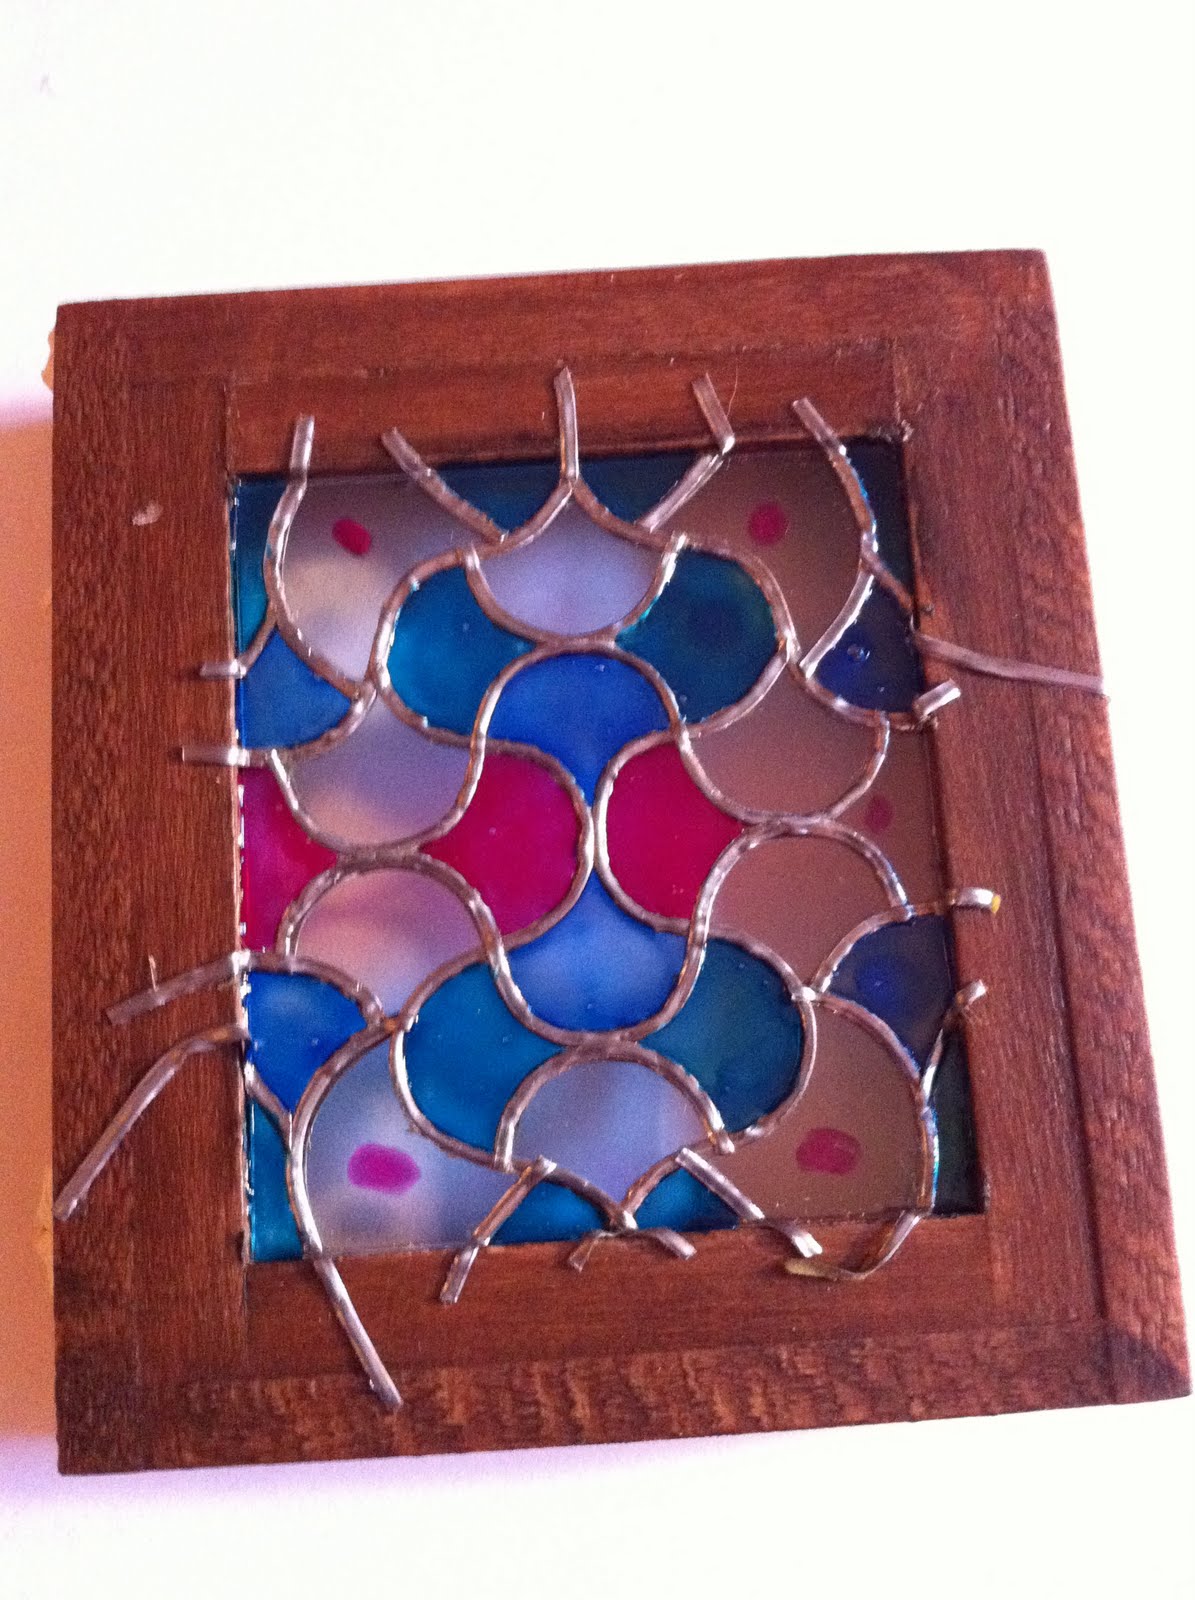
Now, start leading! For a complex design like this, it's especially important that you cut thin strips of lead. Making the curves is a little challenging at first, but it does get much easier. I use my fingers, and my polymer clay stylus to push the tape into place.

I've finished one side. I like to leave the loose edges on, and cut them off right at the end, as the last thing I do. It helps secure the plexiglass in place, as well as makes sure that the plexiglass is fully covered. It's very easy to cut your tape too short, if you're not careful!

Here's the window without the pattern. Notice, in the background, that I'm using a self-healing cutting mat. These things are wonderful--they save your blades, and your furniture! They're inexpensive, and available at your local craft store.

Here, I've finished leading the other side of the window. Take especial care to make sure that your lead matches up; you shouldn't perceive any overlap. It should look, when finished, as though it's one single strip of lead.

Now, you're ready to add the "glass"!

Make sure you're 100% happy with your design before you start on the next step.

I purchased my ink from Jerry's Artarama, but you can find it in most catalogues and art stores. I like Jerry's for their reasonable prices. Although you certainly can buy colors singly, I like getting the whole wheel--you save money, and you get more options! Also, too, sometimes inks just don't look the same mixed into your glass medium as you think they will. When I was making this window, I initially tried magenta instead of crimson, but when I tried it on my plastic test piece, I thought oh, yuck.

Add a little glaze into your dish, and add a drop of ink. Remember, you can always add more ink, but it's a lot harder to take some out! Here, I'm mixing the turquoise ink.

Mix your ink into your glaze.

Try your ink out onto your test piece. I like to save the packaging that commercially made windows and doors arrive in, and use that. As you can see, I added progressively more ink until I arrived at a tint that I liked.

See how dark it looks in the dish, versus how light on the plastic? You'll also notice a difference when you hold your test plastic up to the light. Play around a little bit before you put brush to window, to make sure you like what you've mixed and are getting the result you want.

Now, start painting! I use a tiny brush for this, the smallest I can find. In some spots, I had to go back and add a touch more later on, so each pane would look even. A little unevenness is desirable--real stained glass has a "swirled" look--but too much of a good thing just looks sloppy.
I did a little "paint by number" to help me remember which pane got which color. As I started on each new color, I just lightly tapped my brush against each pane that would receive that specific tinting. The larger the window, and the more complex the pattern, the easier it is to get confused!

Here, the window is almost done. It looks quite opaque, as there's no light behind it. Like all stained glass, it needs light to bring it to life.
This is the time you want to put your window down and walk away. Don't do anything else until it's had a chance to dry! I recommend waiting at least an hour.

Now, very carefully use your craft knife to trim away the excess lead. I score the cut, then use a pair of tweezers to very gently pull the excess lead away. If the lead doesn't remove easily, make sure your cut is fully scored--you don't want to pull the actual window leading away.

Here's the window, with light streaming through. It's still rather dark, as I finished this window and took this picture during a thunderstorm. I'll post a few more pictures when it's brighter!

And now the window is installed.

And here's a view from inside.
9 comments:
great detail love the design looks like a real window not one in the dollhouse
Thanks :-) Hopefully more windows are coming!
Many thanks,this is a very good step by step instruction !!! Jeannette
Thanks for this tut and for listing the sources for the materials!
Daphne, you're welcome! And I love your name :-) I try to list sources applicable to both the US and the UK, but if you're having a difficult time finding something in the UK, let me know and I may be able to help. At the worst, I can send my family out hunting for it in stores ;-)
Soo many thanks for this post, I almost missed it. I want to make my own stained glass window, a round one..so it will be tricky. I want to have a go with the golfers tape, but trying to make it curve maybe tricky.
Michelle :o)
Oh, what a cute little window! I'm sure it would look better if it's an actual stained glass window. Why don't you design a real one for your house? You seem to have a talent in it. =)
Herb Koguchi
I love stained glass and I doubt I would ever try it if I hadn't seen your tutorial. You make it seem so easy and I'll let you know if I run into a problem when I get the chance to try it. You have an immense talent here thank you for being kind enough to share it. Wish all miniaturists shared their talents with us.
Great tutorial, thanks.
Post a Comment