Preparing for the overhaul...

Saturday, January 29, 2011

My Sylvanian Love

I loved Sylvanians growing up.  Owing to no internet, they were harder to find then than they are now.  One Christmas, I remember, all I wanted was Sylvanian badgers.  My friend had them; I didn't.  How I longed for hers.  My dad had a business trip right before Christmas.  He must've searched the entire greater Munich area for badgers.  Toy shop after toy shop came up empty; finally, walking back to his hotel in the snow, he saw them: a family of badgers, smiling out a shop window.  Unfortunately, that shop was in the process of closing.  As the grate came down, my dad charged the door, banging furiously and demanding to be let in.  The shop owner threatened to call the police; my dad--a German, himself, and thus blessed with fortitude of purpose--explained that if he didn't come home with badgers, he couldn't come home at all.

The kind shop owner relented, and sold my dad the badgers.  And I still have them.  And I still love Sylvanians.

Apparently, I'm not the only one: this highly gifted person makes absolutely adorable outfits for hers.

Where Do You Store Your Minis?

A friend of mine asked me this question: where do you put them?

I realized that, despite years of doing this, the answer is still, "I don't know".


The curio cabinet in our front hall.

I keep some of my smaller minis in this curio cabinet, which was made for us by a friend.  It's a really handy way to show off some of my favorite pieces.  Every time I get home from a show, I have fun adding my latest treasure.

But what about my dollhouses?  Ideally, I'd have a room--but that's just not realistic.  And, face it, most people (however misguidedly) don't relish the idea of staring at dollhouses.  Additionally, there are the projects I've finished, but that aren't (in my opinion) high enough quality to display or sell.  I'd give those away, if anyone wanted them.

In fact...anyone want a free roombox?  No, really.  Do you?

So what do YOU do?

Tuesday, January 25, 2011

Hooray For Miniature Needlepoint!

Just a quick note to say, we've added a new section under "Shopping List".  We now list artisans offering miniature needlepoint kits.  If we've forgotten anyone, let us know!  Glorious Twelfth is, as always, a work in progress.

Cheers!

Saturday, January 22, 2011

How To Kit Bash A Medieval-Tudor-Fantasy Bakery

I started out with a kit to make this:


The "Potters Place" kit from Earth and Tree.


It cost 41.00 USD, which seemed kind of steep (it doesn't come with the door, cupola, or anything in the picture.  These days, I mostly cut out the pieces I need myself, or get a friend of mine (who's very long suffering) to do it for me.  If I'm paying him for his time--and he's a skilled cabinetmaker, so his time isn't cheap--it's still cheaper for me to start from scratch.  But, I digress.  And, anyway, I bought this kit back in the heyday of my ignorance.

Since I started transforming it into a bakery, so far, it's turned into this:

I've yet to add a roof, or most of the trim--including any of the half timbering--but at least the basic structure is complete. 


The bare bones of the outdoor bakery area.  I plan to finish everything with a combination of Richard Stacey products (see our "Shopping List" page).  Back in the good old days--and, thus, in the fantasy world in which this bakery belongs, which takes its cues from various late medieval, and early tudor realities--most people didn't have their own ovens.  Chimneys were expensive to build and, in some countries (like France) you needed to obtain a permit beforehand.  Most people brought their dough (and whatever else needed to be baked) to the baker, who baked it for them.

In much of the middle ages, in many parts of the UK, the baker was also the miller.  Although I haven't included a mill (that's off somewhere else, I suppose), I'm envisioning such an arrangement, here.  It goes toward explaining this particular baker's relative prosperity.


Eventually I'll add some support posts here, to prop up the rear end of the hosue. 


A window overlooks the street.  Below, that great gaping hole will eventually be the primary vending area.  Although visitors can also come into the shop, most would've purchased whatever they needed directly from the street.  Many humbler tradesmen lived in one, or maybe two room cottages, and sold their goods basically out of their living room windows. 


The vending window, when closed.  Eventually I'll buy some chain, that'll hold the tabletop open, and also assist in pulling it up and into place.  Designing it took awhile, because it wasn't easy to find hardware and fittings that'd achieve my desired aim. 


This is what it'll look like open, more or less; use your imagination! 

A view of the interior. 


The chimney column runs straight up through the center of the house.  I've left room, over on the left hand side, for an additional fireplace--although the chimney column, itself, would've given off plenty of warmth.  All four sections will eventually have leaded panes; I'm waiting for the next batch of window mullion inserts to arrive. 


Right now, I'm in the process of designing the half timbering.  I also need to get some more wood for the roof.  I'm still in the process of deciding whether the bakery should have a slate or a thatched roof.

So what do you think?  Does anyone have any questions, comments, or concerns?  I'd love some feedback!

How To Make A Tudor Casement Window, Part I

Store bought windows are, for the most part, expensive and poorly made.  There's very little selection, too, when it comes to tudor windows.  The good news is, with a little patience, and minimal investment in materials, you can make your own.  For my windows, I generally use basswood, which is available at any hobby shop, and online.

First, find some inspiration.  I like to troll the internet for pictures.  A good selection of pictures can be found here.  Keep in mind, too, that much of what we think of as "tudor" isn't actually English at all.  Rather, many of the most popular forms--particularly those that've found their way into fantasy literature, and film--are Bavarian in origin.

This is one of my favorite tudor windows.

The next step is to measure--carefully.  I usually try to design my windows, doors, and other architectural elements around readily available components.  It's a lot easier to cut a piece of wood a different length, than to special order a laser cut window grille.  In this case, I designed my window around these window mullions:

They're available from Laser Tech Miniatures, as well as numerous other retailers.  Yes, they're made for a victorian window, but so what?  If you use a little imagination, and think outside the box, it's amazing how much more is out there.

I started by building a frame around two prefab window mullions, using basswood strips.  I left a little gap (about 1/32") between the mullions and the frame, to account for the added mass of paint.  Later on, I'll stain the wood a chestnut color, and spray paint the mullions with flat black paint, to simulate leading--but that's Part II.

The next step was basically building a box around the frame.  Your exact measurements will differ, depending on the overall dimensions of your dollhouse.  Here, I left a little overhang on both top and bottom.  And, if you're wondering how I got those carved posts...

Recognize these?  I married two newel posts by cutting off the ends and gluing them together, and then, after the glue dried, I used my table saw to cut a small channel out of the back.  Note, here, that this is a DANGEROUS thing to do, as it requires your fingers to be in very close proximity to the saw.  Don't try this at home, and all that.  Seriously, though, any time you're using a table saw, be VERY careful, and observe every proper safety precaution.


A view from the back.  The channel I cut was a small one--about 1/4".  Remember to lower the table saw blade, otherwise you'll just end up slicing the newel posts in half.

Note, here, also, that  the front overhang doesn't extend all the way back.  If it did, you wouldn't be able to fit the window into the window opening.  Rather, the front overhang should lie flush against the exterior wall, while the rest of the box extends all the way into the room.


Compare the inside of the box, with the front overhang. 


It's important, when you're designing a window, to visualize how it'll fit into the dollhouse itself. 


I periodically dry fit windows, etc into place, to make sure I like how they're coming out.  Note, here, that the window hole I originally cut is larger than the window I ultimately decided to make.  Don't let the size of the window holes in your dollhouse kit restrict you; you can always either make them larger, or use strips of basswood, or even balsa wood, to shrink them.

Most commercially available dollhouses have absolutely enormous window holes that are really too large for a medieval or tudor dollhouse.  They're meant to fit commercially available windows, which are, by and large, of the American victorian style.  Sometimes, smaller is better. 


A close-up view. 


Another close-up view.  Sometimes it takes a little wiggling to decide where, exactly, you want your window to sit.  Also, seeing it in place like this helps me to decide what extra trim I want to add.


I added a skirt using commercially available 1:12 scale dentil trim.

It sits flush with the exterior wall. 

I added a small piece of wood to create a sturdy bottom.  In real life, the dentil trim would've disguised a morticed support, keeping the window up--and its occupant from falling out!  But, you can certainly add any kind of supports (corbels, brackets, etc) you like.


An aerial view of the back of the window. 


A close-up of the completed bottom support.

With a window like this, the challenge is the design.  I find that, when I make windows for a house, the first window takes about five times as long as all the other windows combined.  I like to spend a lot of time measuring, dry fitting, etc to make sure everything's completely perfect.  Then, for the rest of the windows, I essentially copy what I have.  Small variations on a theme--remember, tudor houses tend not to be homogenous--are desirable, and fairly easy to achieve with a little practice.

In Part II of this tutorial, I'll show you how to finish and install the window.

Friday, January 21, 2011

Michelle's Miniatures Gypsy Caravan Kit: It Finally Arrived!

Over the next few months, I'll be reviewing kits as I receive them and complete them.  I love reviewing kits, probably because I love making them, and reading others' reviews about them.  Surprisingly, given how popular the hobby is, there aren't that many interesting kits out there.  Which, if you know of any good kits, or kit vendors, and they're not already listed under our "Shopping List", let us know!  Anyway, in this relative vacuum, Michelle's Miniatures is a real standout.

After the beginning of the year, I ordered her gypsy caravan kit.  I was really attracted to the kit, initially, because I like smaller dollhouses, and other dwellings--especially those with lots of personality--and because it reminded me of gypsy caravans I'd seen at the Fryeburg Fair as a child.  I'm sure we're not alone in this, but Maine's largest county fair has a really incredible transportation museum.

After a couple weeks' anticipation, it arrived yesterday--and I already have some very positive things to say about it, and Michelle's Miniatures in general.

The store was very easy to communicate with; I received a notification of my order, another email discussing its likely ship date, and delivery method, and a final email giving me the firm ship date.  The kit itself arrived (from about a thousand miles away) two days later.  I opened the box with great anticipation, and I wasn't disappointed.

The box was very well packed, and the instructions--which I immediately read through--are copious and excellent.  They're very complete, but, at the same time, written in a very encouraging tone.  Unlike a lot of directions, which make you feel bad if you mess up, these explain, clearly and concisely, what you need to do--while, at the same time, encouraging your creativity.


Each individual section is carefully packaged.  You don't have to open everything at once, to begin the kit; you can use each section as you need it.  As someone with a very small work area, who often needs to clean up craft mess quickly--and keep it away from little hands, cat teeth, etc--I appreciate this feature a lot.


Everything is very carefully labeled. 


The detail and craftsmanship of each individual piece is incredible.

I'm really looking forward to beginning this kit--which I'll be able to do soon, once I finish the bakery shell--and I'll keep you updated on my progress!

Wednesday, January 19, 2011

FOR SALE: Nonesuch House, An Artisan Crafted Tudor Dollhouse

Whimsical Nonesuch House is for sale!  We are asking 1,250.00 USD.  Nonesuch House measures 27" tall, by 20" wide, by a convenient 10" deep.  Both fireplaces are electrified.  This is a perfect dollhouse for your tudor or fantasy collection, and would work equally well with both.  See pictures, and learn more about how this completely one of a kind house was created, here.  It's really cute!

We will happily deliver it to you, free of charge, within a 100 mile radius; inquire further for details.


If you're interested in purchasing Nonesuch House, please visit our Etsy store.


Don't hesitate to contact us with questions, comments, or concerns!

FOR SALE: Historically Accurate Tudor Fireplace Wall With Optional Open Air Oven

This lovely fireplace wall would be perfect for your historically accurate tudor home or room box.  Unlike many medieval, tudor, and fantasy fireplaces, it's large--like it's "real life" cousins!  Its aged appearance reflecting years of cooking, it's all ready for your pasties, pies, and roasts.  This piece is entirely handmade, and based on photos, sketches, and measurements of the real thing.  It's one of a kind!

The fireplace is "sandstone", aged to replicate years of hard labor.  The center middle section is the main fireplace, where most of the cooking was done.  The left-hand section is the tudor answer to a stovetop; pies, and other items needing a lower temperature (and reacting poorly to open flame!) were cooked here.  The right-hand section is for wood.


A close-up of the "stone". 


I'm a stickler for detail; the soot, grease, etc extend all the way up the chimney column.


The (removable) mantelpiece is unfinished, so you can stain it, paint it, etc to match your own decor. 


A close up of the moulding. 


The fireplace features an optional open air oven.  It's built so that you can enclose it with your own chimney column, if you so desire, thus giving it the "built in" feel.  In real life, there would be chimney walls on either side of the oven front, which would be recessed into the chimney.  Here, the "stone" hasn't been aged, but has been left "new" so you can match it to your own decor.  The oven "floor" (bench) is unfinished, so you can finish it to match your house's exterior.


An aerial view of the fireplace wall.  The oven "floor", on which the oven face rests, is currently attached but can easily be removed.

The overall dimensions of the fireplace are 14 1/4" wide by 6 3/4" tall.  It extends 1" into the room, and needs 3" of backspace.

If you're interested in purchasing it, please visit our Etsy store!

Monday, January 17, 2011

Bashing A Bakery

Yes, I've got a number of projects going at once.  This isn't unusual for me; I find that some days I'm in the mood to work on some, et cetera, et cetera.  For the longest time now, I've been searching for a good bakery kit.  I absolutely adore miniature baking--it's a hobby I share with my mum, who's extremely talented--and have decided that I need somewhere to put it all.  But what to do?

I'm not opposed to kit bashing--I kit bashed the heck out of the as-yet-unrevealed large tudor--but for kit bashing to work, there has to be something reasonable to, you know, bash.  Every possibility I discovered was either too tiny, or too enormous.  On the one hand, nobody wants a ridiculously large bakery.  At least, I don't.  If it's baronial in scope, well then, it might as well be a Dutch coffee house from the 1600's, and I'm not especially interested in reproducing the dawn on the stock market at this time.  And if it's too tiny, it's rather ridiculous.  A bakery needs at least two distinct areas: for displaying and selling, and for baking.

Now, for some time, I've been working on a small outbuilding for a different project entirely.  As I'd rather lost interest in the outbuilding, it's been sitting on my shelf.  It occurred to me that, well, I could take a mallet to that.

Pictures forthcoming but, in the meantime, I have a question: have any of you built bakeries and, if so, how?

Saturday, January 15, 2011

Wizard's Eyrie: Installing The Floor (Again!)

The first time I installed a floor, it didn't work out so good.  I managed to get up most of the dried epoxy, but the subfloor wasn't a pretty sight.  The question was: what should I put down instead?  I briefly considered using the flagstones I purchased from Richard Stacey, but decided they were too big.  With any dollhouse, scale is an important issue--and I don't mean, 1:12.  

Just like with a real house, smaller houses need smaller design elements.  2' crown moldings might look astonishing at Buckingham Palace, but they'd look pretty horrendous in a 1,500 square foot craftsman style bungalow.  I actually purchased the flagstones for my larger tudor home--photos forthcoming!--and that house, with its grander scale, is a better fit.  Each flagstone is about 1.5" x 2".

So, in the end, I settled on scribed sheathing.  It looks like planked flooring, which is nice.  I used the same product on the interior walls of the addition.

I epoxied the new flooring in place, lightly sanded it, stained it, and applied two coats of varnish before sanding.  Then, after lightly sanding it again, I once again applied a finish coat of stain, er, watered down craft paint.

Again, for authenticity, I gave the addition different flooring.  I also decided to have it pointing in a different direction, so the change would look a little more "on purpose".  I glued the main section in place, and finished it, before dry-fitting these new pieces.  Also, I didn't want paint getting everywhere, so I pre-stained the pieces before gluing them in.

 I dry fitted the hearthstone in place and glued around it, to make sure it'd fit.  

Coming soon: the rest of the trim.

Friday, January 14, 2011

Making An Authentic Tudor Thatched Or Sod Roof, Part II

This (picture heavy) post is a follow-up to Part I, and covers the next phase of installing an authentic tudor roof.  As always, I welcome your feedback.  It gets a little lonely, here, sometimes!

 A view of the ceiling.  There are a few little bits hanging out, but I'm not too concerned at the moment.  I'm going to touch up the inside, and deal with any problems, when it comes time to cut, finish, and install the interior support beams.


Another view of the ceiling. 


I dry-fitted some of the paneling, to get the general effect. 

A close up of the fabric.  You can see what I mean about it having a "direction".  It looks and feels like mossy bark.  Scale is a critical issue, here; small scale "bark" and "moss" don't look the same as our full scale stuff. 


I find it helpful to cut out a pattern, first.  This helps save aggravation...and fabric!  This is the back view of the fabric.


I trimmed the fabric with a (very sharp) x-acto knife, before attaching the wood trim. 


I ran extra pieces of fabric around the underneath of all the overhangs.  It's important, here, to remember that all the fabric pieces point the same "direction"!  This is really one of those situations where the final product is more than the sum of its parts.  No, it doesn't look very realistic now...but it will. 


I repeated the same procedure with the front, as I did with the back. 


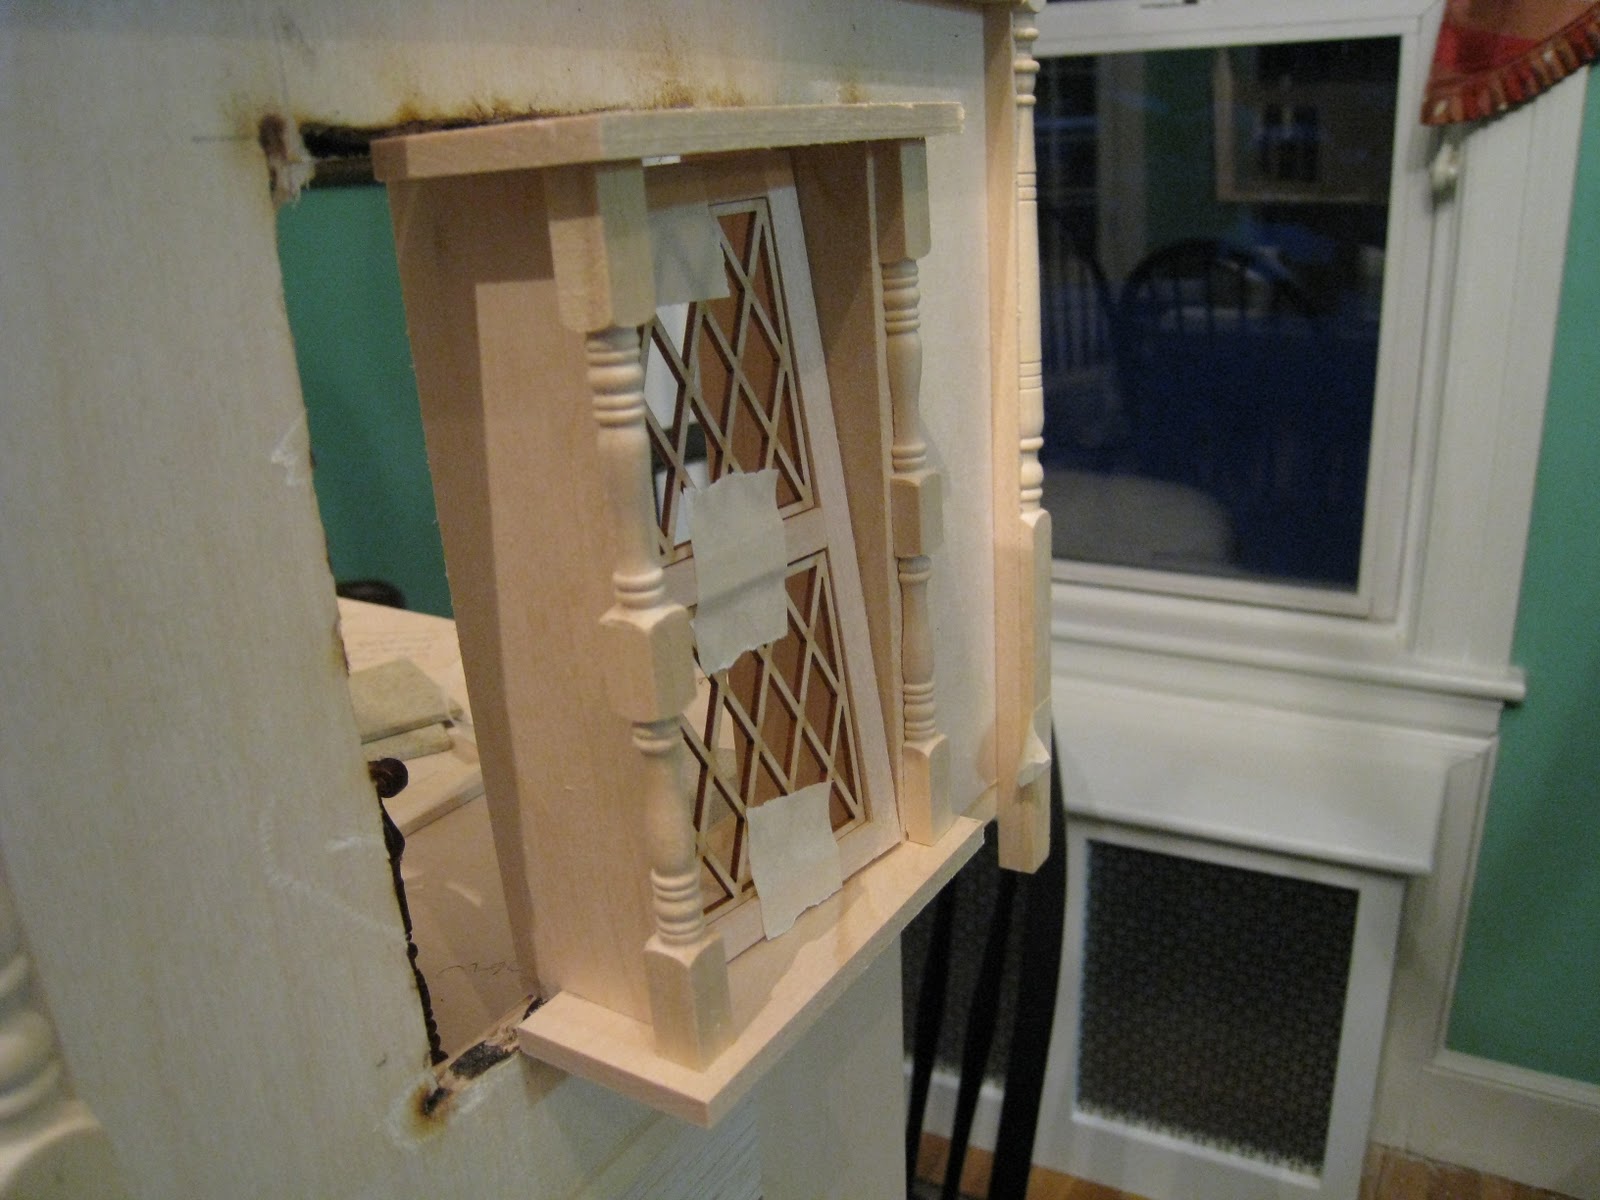
I found it easiest to tape the overhang in place, allowing the glue time to dry, before trimming it to fit.


Our little eyrie is getting somewhere! 


Fitting all the eaves with fabric is a super tedious process, but completely worth it in the end. 


I (carefully) patched holidays with tiny extra bits of fabric. 


A view of the inside, with the edges all trimmed. 


I waited until after I'd trimmed all the edges, and applied the basswood facing, before applying stain.  The stain I'm using on the exterior is a raw umber.  After the stain dried, I applied two thin coats of satin varnish.  Here, the varnish serves a dual purpose; I gently went over just the edges of the fabric with varnish, to keep it from unraveling.  Little bits and pieces of fabric poking out is desirable; this is, after all, supposed to be made of bark and sod--a little mess is realistic.  However, you don't want pieces of fabric hanging out all over the place--or, indeed, unraveling completely over time.


Another view of the finished edging. 


A close-up of the varnish bead. 


Another close up of the varnish bead. 


The reason it's important to carry the fabric all the way around is, this roof is supposed to be as authentic as possible.  In real life, the whole thing would've been made of a various combination of planks, bits of bark, bundled rushes, and/or sod.

The cats eventually got bored of watching me and decided to take a nap on top of the radiator cover.

OK, now we're ready for the second phase of this roof.  No tudor ceiling is complete without interior beams.  Particularly, too, with fabric like this, you need mixed media to break up the patterns and textures, and make the final product seem a little more authentic.  I began by selecting a slightly smaller piece of wood for the interior beams.  In a real tudor home, many different beams of many different dimensions were used, depending on their intended function--and, of course, on the amount of weight they were meant to bear.  Using the same size wood, exclusively, will both bring your house out of scale, and look inauthentic. 


I dry-fitted the interior beams.  For this project, I decided on five beams.  You can see, in this close up, one consequence of using fabric: a buckle, directly above the right-hand beam.  I solved that problem by making a small incision--along the "direction" of the fabric--with my x-acto knife, daubing in some blue, and pressing the buckle flat.


Because the beams require a bit of a funny angle, it's important to dry-fit them.


Here, I'm testing the beams out for length.  I cut the steep angle first, because it's the most challenging, and then pressed the beams toward the ceiling, to determine the exact length.  It's better to start out slightly too long, and shave down, than start out too short and waste wood.

After I dry-fitted the beams running along the far ceiling, I cut and dry fitted the beams running along the near ceiling.  In my house, these latter beams slightly overlap the first set.  For authenticity's sake, I wanted everything to fit together as perfectly as possible, so I made a lot of fine tuning adjustments.  It was stressful, yes...but really rewarding at the same time.

Oh, and hey...in case you're wondering, "what are those pegs, and that hanging chair about?", I was inspired by American Amish architecture.  The Amish are tremendous believers in utility, and we can all learn a lot from them.  The American Shaker movement certainly did; many authentic Shaker homes, and public buildings, feature the same system of pegs.  Basically, the Amish hang everything from chairs, to side tables, to quilts on the wall, when they're not being used.  The idea is to get them out of the way, so the room can be put to as many different uses as possible.  When friends come over, you can take the chairs down off the wall; after they leave, you can hang the chairs back up and use the open space to lay out quilt pieces.

Since this is a fantasy dollhouse, I borrowed these indigenous American elements.  Actually, if you look closely, Peter Jackson did something quite similar when he conceived the film version of Bag End.  Amish, Shaker, and Tudor elements blend a lot more elegantly than you might at first assume!  Because my little hut is so small, I wanted to furnish it with more delicate furniture.  These chairs were purchased at a show from Pete and Pat Boorum of Smaller Than Life.  They make many wonderful pieces, all of which exhibit extraordinary craftsmanship.  Simple furniture relies on proportion to achieve beauty, and their furniture is unusually elegant.