Preparing for the overhaul...

Saturday, March 26, 2011

I Need A New Camera--Any Suggestions?

There's a lot of great things about my current camera, but one area where it doesn't excel is in up-close shots of my miniatures.  Everything comes out warped!  I need a camera that can take good detail shots, that isn't so prone to the curse of fisheye.

Any suggestions?

Thursday, March 24, 2011

Making An Historically Accurate Tudor Window

In tudor times, glass was a precious commodity.  Only the wealthy could afford it and, even then, hardly ever in abundance.  Commonly, glass windows were only actually glass in a small portion.  Usually that portion was the upper half, or maybe just quarter, of the window.  The rest of the window was covered by a shutter.  In good weather, the shutter could be opened to let in fresh air; in bad weather, the shutter could be closed, but light could still get in through the upper part of the window.

From the early middle ages through to the modern era, two commodities were even more precious than glass: light and fresh air.  Windows from the time reflect builders', and homeowners' recognition of their importance.  Most tudor families lived in dank squalor, but not by choice.  A window like the one I'm building would've been popular for its ability to bring what light and fresh air there was into a room.

I'm about at the halfway point with this window, and thought you might be interested in seeing where I am.  Sometimes it's easier to understand how something's built when you see it mid-progress.  This is part of a project I'm working on right now, a tudor-era merchant's house and shop.

I made the frame for this window out of two Houseworks 12-light windows.  Since the original window isn't meant to have individual glass panes, I had to cut them out of plastic.  I just used the plastic supplied with the windows.

After I fitted them in, I glazed them into place with some of my trusty DecoArt glaze.  Here, I've finished one pane, so you (and I) can see how it'll look when it's done.  The rest have just been glazed into place. I laid the lead tape right over the glazing.  I think the secret, here, is to glaze with a light hand; it's hard to disguise lots of bumps and lumps.

Here's a close-up of one of the glazed panes.

Here's a close-up of the shutters.  So far, I've only attached shutters to one side.  The weatherly side is quite a bit darker and more aged than the interior side.

I liked the double hinged effect.  The Houseworks brass hardware isn't exactly historically accurate, but it's also the best-made hardware on the market.  There's plenty of more accurate-looking hardware, but I've tried a lot of it and most of it doesn't work.  One company's products (which purport to be American Colonial but could work in a medieval or tudor setting) were really disappointing to me, because the hinges bent.  They bent so much, and so easily, they couldn't support the weight of the door.  Even swinging it closed changed their shape.  Sometimes, modeling means trade-offs, and if it's a choice between accuracy and utility, I, personally, would rather have utility.

Here's a view from above.

And here's (sort of) what it'll look like from inside.

The shutter folds up, allowing it to be put out of the way when not in use.

I added some nail holes and gouges, to give this wood the effect of having been previously used.  It's tough to remember this, sometimes, but most things were recycled.  Completely new items, made from newly fabricated materials were a luxury.

So here we are...halfway there!

Tuesday, March 22, 2011

But Won't Lead Kill Me?

My husband raised a good point the other night: isn't lead poisonous?  Won't working with lead tape a lot kill you?  Is there any safe way to create these windows?

I'm not a doctor and I don't play one on TV.  This post isn't a substitute for actual medical advice.  If you have any concerns, please talk to a real doctor.

I did some research.  According to several reputable sources, including OSHA, lead is dangerous--but not to your skin.  Rather, with a couple of exceptions for certain lead-baased industrial compounds, lead gets into your blood stream not through your hands, but through your mouth.  It's a really good idea, therefore, to wear a mask.

Also, to be on the safe side, you should...
  1. Wash your hands (including the undersides of your fingernails) thoroughly after each and every handling.
  2. Remove all detritus from your work area after every session.
  3. Be really careful to keep any stray lead bits away from your clothes.
And if you're pregnant, you probably shouldn't touch it at all!

I've been making art of various types for years, and I've taken some pretty dumb risks.  But, as one gets older and contemplates having (and, indeed, raising) children, one becomes more aware of the dubious possibilities.  I'm a lot more careful now than I was!  I do, however, have numerous scars to prove each (hopefully past) stupidity.

Any horror stories?  Safety tips you'd like to share?  Thoughts on making windows...or anything else?

Monday, March 21, 2011

My Workshop

As the saying goes, it ain't pretty, but it's home.  I thought someone out there might be interested in seeing my workshop, and hearing about how I've managed to contain a very space-consuming hobby in a very small space.  I've really struggled, in the past, to contain my craft supplies--they're always threatening to take over the house--and it's been difficult to come up with a workable solution.

We were very fortunate in that, when we moved into our new house, the basement possessed two qualities: it's very dry, and it came equipped with a workbench.  That saved me the trouble of building one.  It's a well-made workbench, too, which is a bonus.

Here we are!  My workshop area curves around the wall to the left.  As you can see, it shares space with the laundry area (my folding table is behind me as I'm standing to take this picture).  It's a small space, but it's worked out really well.

My two PREAC mini table saws, as well as some wood, and a variety of organizational aids.

My workbench area.

Another view of my workbench area.

My tips (learned through unfortunate experience) for creating--and containing--your mini space:
  1. Pick a space and commit to it.  I do bring things upstairs for natural light, more space, etc, but they always go home at the end of the day.  The problems start when multiple rooms become "homes". When this situation has happened to us in the past, the culprit has been lack of organization.  As my piles of stuff have grown, so has the space required for it.
  2. Stay organized.  I know where everything in my workshop is at all times.  I try to tidy up as much as I can, and do a full-on reorganization at least once a month (or as necessary).  Lack of organization leads to missing items, multiples, and general squalor.  Not to mention, if you're anything like me, you end up hanging on to bits and pieces you don't really need--and making room for them in your workshop, along with the things you really do need.
  3. Throw things out!  I apply the same rule to my workshop that I do to the rest of my house: if I haven't used it for six months (or a year if it's seasonal), throw it away or give it away.  With a few obvious exceptions (my grandmother's candlesticks), anything I haven't used...I don't need.  Just knowing that I'm not keeping it forever--unless I'm using it, anyway--prevents me from buying unnecessary supplies.  If I see something incredible, and I can afford it, I buy it.  Maybe it'll be five years before I find the right house for it.  But, let's be honest, lots of things seem "incredible" in the heat of the moment.
  4. If at all possible, develop three discrete areas: one for tools, one for your current project, and one to actually work on.  My space is tiny, and yet my big tools are always on one table, my houses are always on another table, and there's always a section of my workbench clear for actually working.
  5. Trays are your friend.  I have lots of small rubber bottomed trays from Target.  They're meant to be drawer organizers (each is about 6" x 9"), but I use them to keep my projects separate.  Once I've cut all the pieces for a particular item--say, a highboy, or the pieces I need to make a window for one of my houses--I keep everything together in a tray.  That way, when I'm ready to work on something, I can just take the tray out--and put it back--without losing anything or getting any pieces confused.
  6. Keep your half-completed projects separate.  I have a wire shelf unit entirely devoted to housing half-completed projects.  They're out of the way; they don't get eaten by the cats; they're ready and waiting (and unmolested) when I need them.
  7. Invest in organizational aids.  I love rolling drawer carts, map trays, etc.  They help me keep everything in pristine condition.
I find that, with minis as in real life, a little organization early on can go a long way.  It's easy to get your things (and yourself) in place before you start a project; it's hard to stop, and impose some sense of organization mid-stream.

Do you have any good organizational tips?

Friday, March 18, 2011

But Where Can I Find This Stuff?

I've written a number of tutorials, many of which mention pretty strange materials--like lead tape.  Where the heck does one find this stuff?  These aren't exactly every day things.  Most of the alternative techniques I've developed, and materials I've found have been the result of desperation.  Hobby-specific supplies often aren't that great--or, conversely, they're fantastic but ridiculously expensive.  I don't know about you, but I have a limited amount of money to spend on miniatures and a family to support.  Nobody would fancy it much if I spent the week's grocery budget on minis.

Making matters more complicated, I'm in the US and most of you, my readers, aren't.  It's just not that easy to find suppliers who ship internationally.  Specifically, many of the materials used in my lead paned window tutorial are pretty obscure.  The good news is, you can get everything you need from one of my favorite sources: Amazon.  Amazon UK sells lead golf tape for £5.99.  You can also get DecoArt Triple Thick Brush-On Glaze for £4.99.  All of the windows I use are available from Hobby Builders Supply, which ships internationally.

Many things, like Americana craft paint, aren't readily available outside the US and Canada.  The good news is, other brands of acrylic craft paint are.  I happen to like Americana, but I by no means use it exclusively.  With the exception of a few very bargain basement brands, which are usually pretty easily identifiable by their misspelled labels (and other obvious flaws), all acrylic craft paint is pretty much interchangeable.  You might not be able to find the exact same paint in the exact same color, but you can pretty much eyeball it.

If I'm searching for a new color, I tend to splurge on five or six containers at once.  As they cost about 99 cents (USD), that's not too bad.  Also, too, I find that, for one thing or another, I use every color for something eventually.  I try them all out on a piece of scrap wood, wait for them to dry, and decide what I like the most.  It's important to let the paint dry completely before making any decisions; some burnt umber-type colors tend to be very ashy and purple when they dry.  I personally prefer a richer, warmer hue.

I hope these pointers were helpful.  If anyone has a particular product they're looking for, let me know!  I'd be happy to help.

Wednesday, March 16, 2011

How To Make A Dollhouse Miniature Lead Paned Window

If you're interested in making the casement window itself, go here.  This is the second half of a tutorial on making really authentic dollhouse miniature windows.  I've been experimenting with this technique for a bit, and I think it works really well.  Windows have always been a thorn in my side; commercially available products just don't cut the mustard.  They usually aren't very well detailed, and take whatever project I'm working on completely out of scale.

Enter: lead tape.  Yes, the same stuff golfers use to weight their clubs.  You can get a roll of it online; I got mine on Amazon.  The other supplies you'll need are,
  1. A double-end ball stylus; I like the Kemper DBSS.  You can buy it here.  Kemper makes really nifty tools, and a decent stylus is a terrific investment.  It only costs three dollars!
  2. A paper pattern.  I got mine by trolling the internet for pictures of window patterns I liked, and then resizing it on my computer.  You can also draw your pattern freehand.
  3. DecoArt "Triple Thick" Brilliant Brush-On Gloss glaze.  You can buy this at Michael's (or any big box craft store).  I'm sure you can also find it online.  Trust me, it's worth searching out the right materials.  For clear, wavy panes--such as one finds in real old houses--this works the best.  I know; I've tried several different glazes.
  4. A self-healing cutting mat.
  5. A metal ruler.
  6. A really sharp x-acto knife.  I always buy extra blades every time I'm at the craft store.  They dull very quickly--especially when you're working with a difficult material like lead.
  7. A window!
And now...


The first step is to cut out the pattern so it exactly fits inside your window pane.

I copied several different patterns I liked.

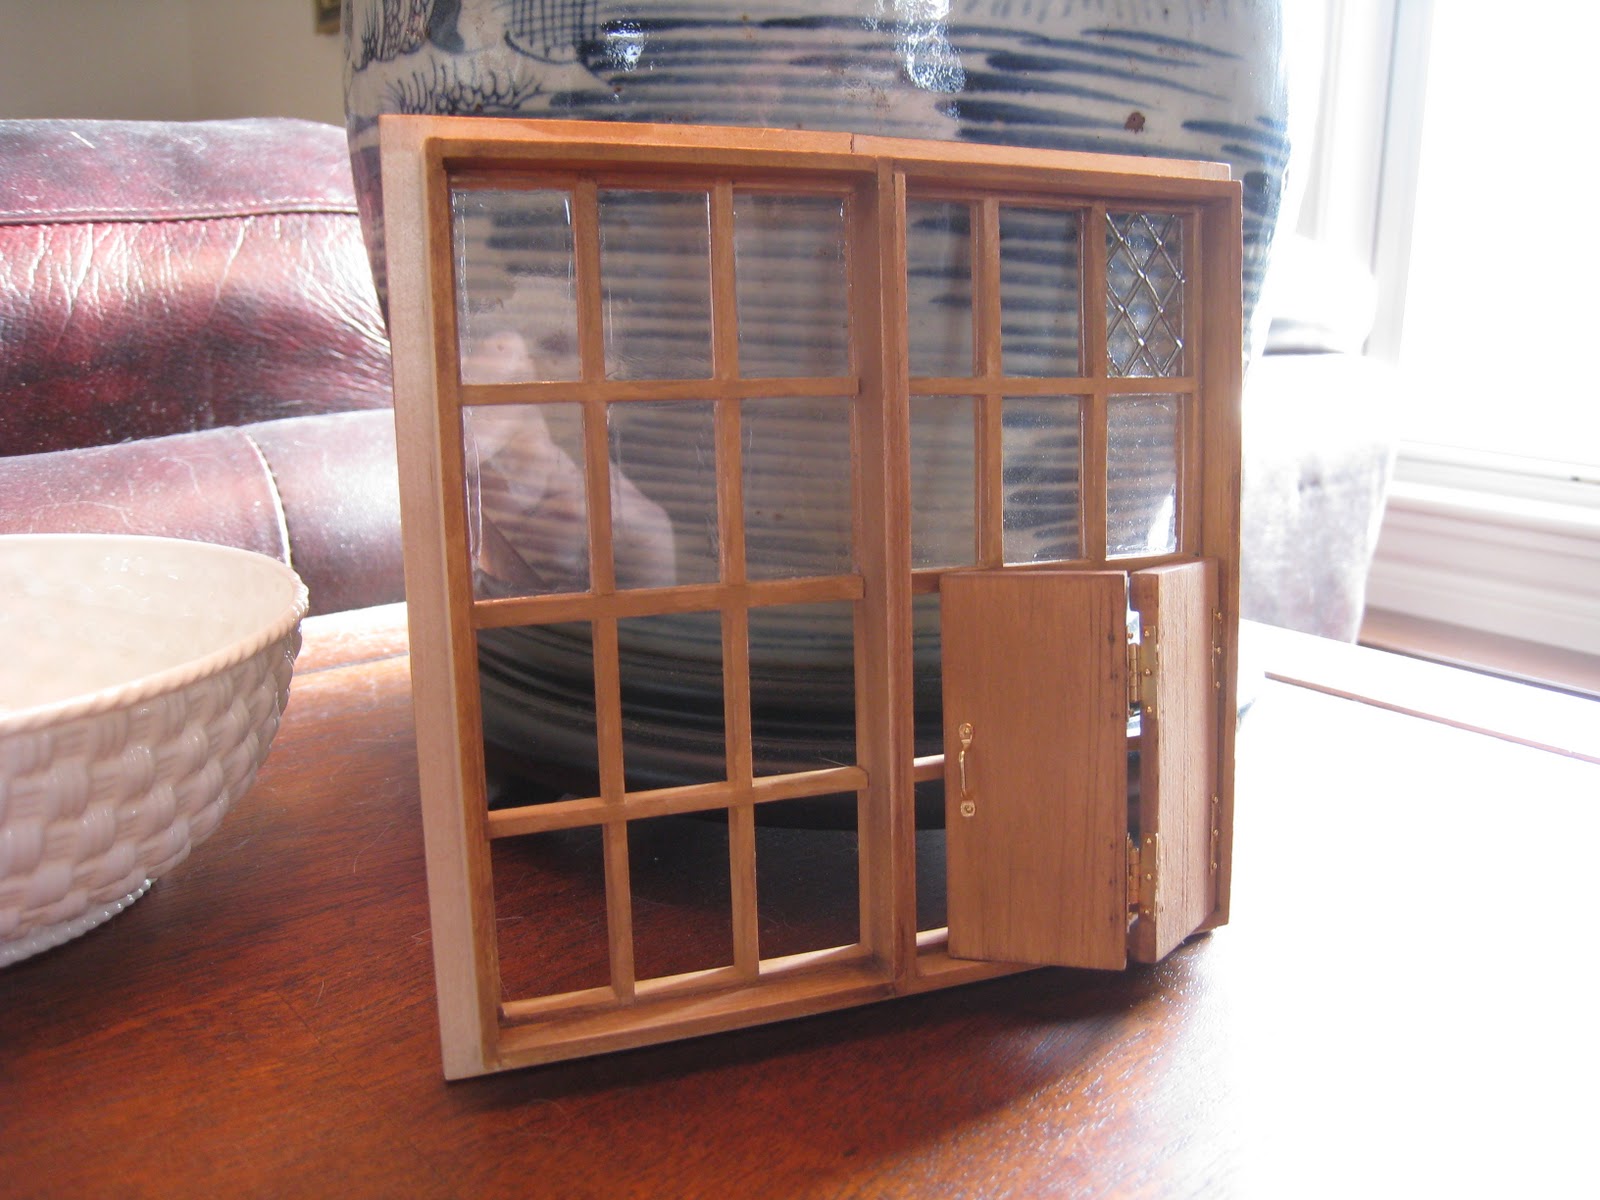
Here, I've fitted the pattern inside.  It goes without saying that you should completely finish your window before moving on to this step!  This window, in case you're interested, is a casement window I purchased from Hobby Builders Supply.

This is lead tape.  It's real lead.  Be careful.  Your next step is to cut off a piece and, from that, cut off a very thin strip, about 1/32" thick.  The first few times you try this, it'll be pretty disheartening.  After you've practiced awhile, though, you'll find that the process gets much easier.  I cut my strips freehand.

Pull off the backing, and begin to lay the lead along the lines in the pattern.  Use your stylus to gently press it in place.  The tape has an adhesive backing, so it'll stay where you put it.

Here, I've laid a couple of strips.

It's slow going, but the learning curve is very steep.  Don't be discouraged!  You'll be making Tiffany-style windows in no time.

It's OK if the lines get a little messed; real lead paned windows weren't perfect, either.

Keep laying your strips...

Now, you get to start going the other way!

Using your stylus, press the crossed pieces together to form a joint.

Here's the first side completed!

And here it is without the pattern.

Now, flip it over and do the other side, matching the lines to each other as exactly as possible.  It really is very important to do both sides.  This is part of what creates such a level of realism.

Now, both sides are done.

Isn't it cool?

Occasionally, you'll look at your completed lead lights and something will seem out of place.  You can use your stylus to mush the lines around a little bit.  Make sure you're happy with how everything looks before you move on to the next step!

Now, do the other side.  I know, I know, snore.  But, really, it'll be so worth it in the end.  And, you know, if you find this really boring, it's a great way to keep your hands busy while watching TV, etc.

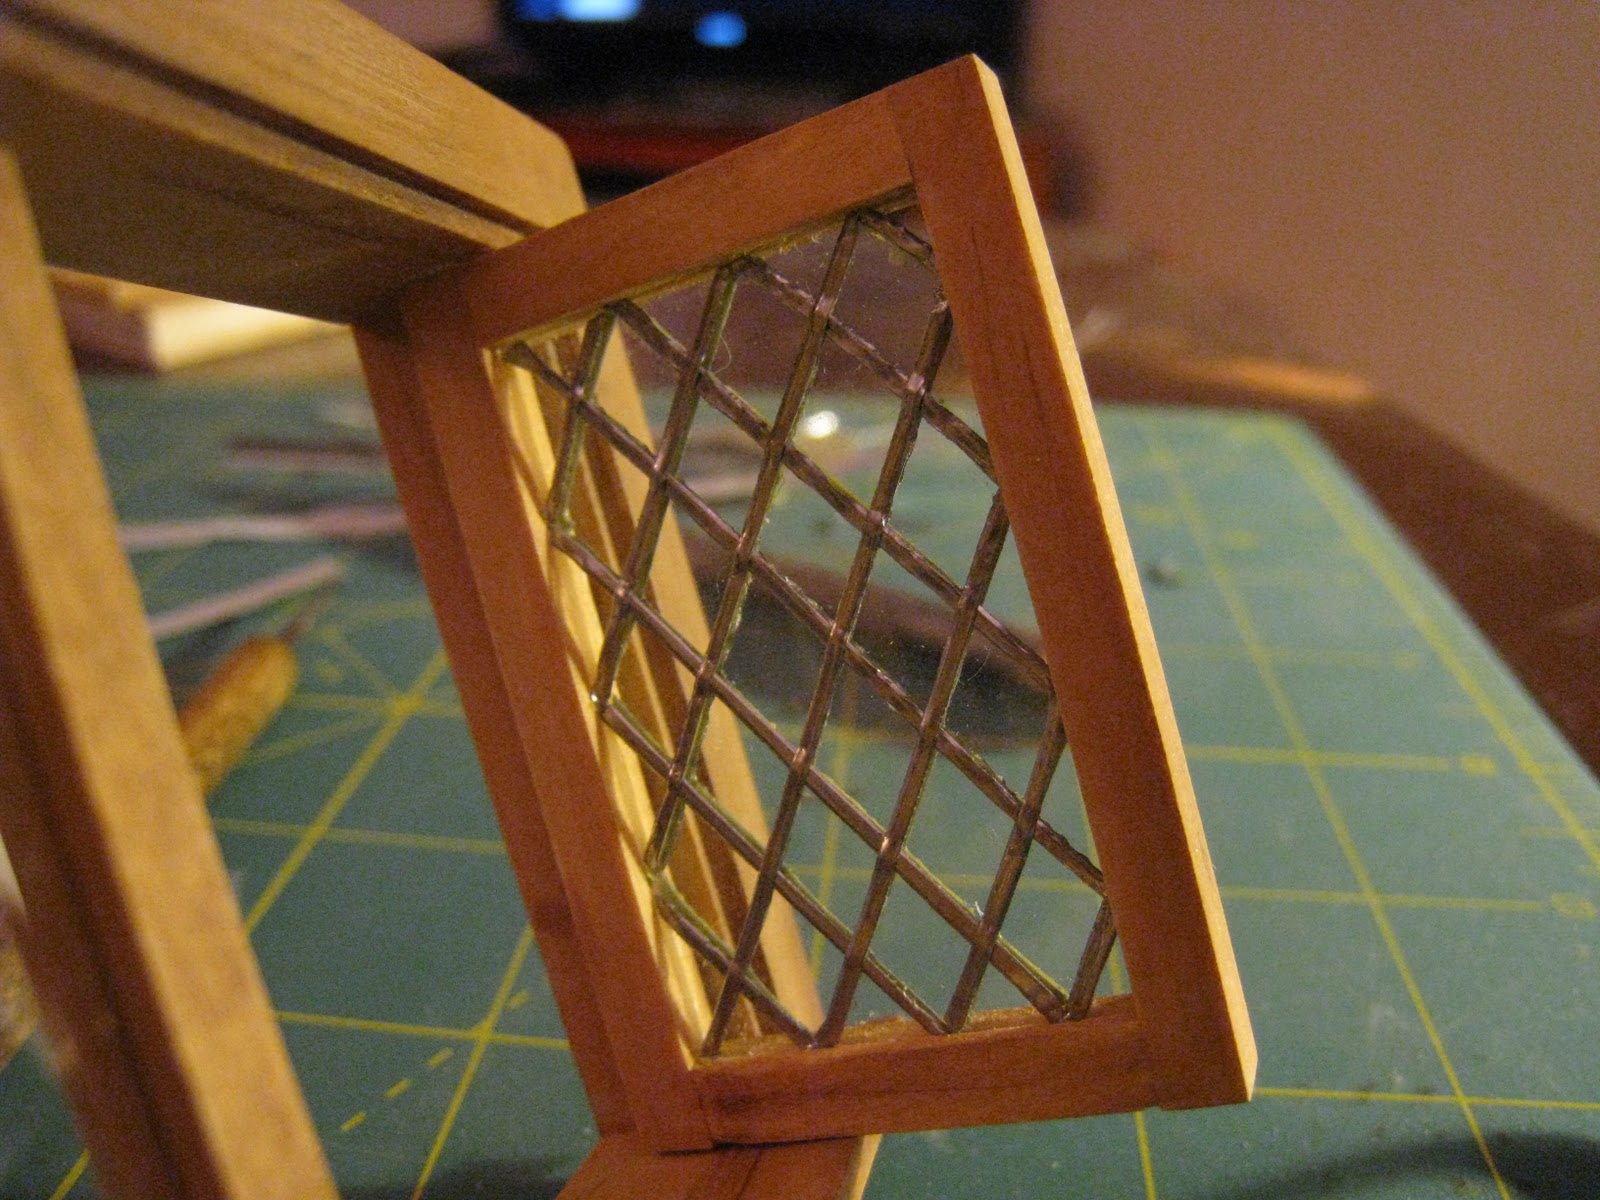
Now, all four sides are complete.

Almost done!

The window looks pretty good, but not great.  It won't be great until you glaze the panes.  In this tutorial, I'm just making very simple clear panes.  If anyone's interested, maybe later I can do a tutorial for stained glass?

I love this stuff.  Using a very small brush (I prefer a pointed tip), gently fill in each pane.  Go slowly and carefully, making sure the glaze touches each each edge completely.  Otherwise, the glaze has a tendency to pull away from the lead.

Here, the right side is done and the left side isn't.  I'm showing you the window like this for the purposes of contrast.  Glaze really does make a difference.

It's wavy, just like real (antique) glass.

I like the way the light streams through.

And there you have it: the beginning steps.  Of course, you'll want to glaze both sides, front and back.  Then, let your window dry completely--ideally a full 24 hours.  I like to do the front, then let it dry overnight before flipping it over to do the back, and then waiting another day before installing the window.

What do you think?

The Weathered Effect

I've been working on some individual components for a project that requires a very old, weathered look, and thought you might be interested in how I'm doing it.  If you want to follow along, the materials you'll need are pretty simple and inexpensive.  An initial investment of less than 50.00 USD will last you for many, many projects to come.
  1. A small stripping brush; this is the one I use.
  2. India ink.
  3. Acrylic craft paint.  In this project, I used two colors, both from the "Americana" line: cocoa, and dark chocolate.
  4. Sanding sponges (medium and fine).
  5. Water-based matte varnish.
This is one of many different aging or weathering techniques you can use.  I like this process, and these materials, because they're very adaptable.  So what you want to do is...
  1. Paint your entire item with the base coat (in this case, slightly diluted "cocoa").
  2. Apply two coats of water-based matte varnish, allowing ample drying time in between.
  3. Sand your item until it's smooth, allowing for lighter areas to appear naturally.  This process will begin to simulate the natural aging and weathering process: the sticky-outy areas get the most abuse.  Ideally, your item should be very smooth to the touch before you begin using advanced weathering techniques.
  4. Now, go to town on your item with your stripping brush.  Depending on the final effect I'm trying to achieve, I often repeat this process several times as I apply new washes.  The more care you take with this step, the more depth you'll achieve.


This is the finished door, on the exterior side.

This is the finished door on the interior side.  As always, you can click on the picture to see a larger version.  The first thing to keep in mind--obvious as it is--is that different areas of a door (or anything else) weather differently.  The principal reason so many "weathered" miniatures look unrealistic is that weathering has been very uniformly--and thus unrealistically--applied.  Before you start, think about where, in real life, your item would be weathered.  Here, both sides of my door are very aged, but the exterior side has obviously been exposed to the elements to a much greater extent.

The first step is to cover your item with a wash of your darker colored paint.  I like to apply my wash in small areas and wipe it off.  To make the inset panels stand out, I painted them with only very slightly diluted "dark chocolate".  I also painted the sides of the panel frames.

The next step is to apply a wash of India ink.  I usually add two drops of ink to every inch of water in my mixing cup, but you can play around with your own mixture.  I paint the ink wash on, and immediately rub it off.  The idea, here, is that the ink wash settles in the cracks.

I only added an ink wash to the exterior side of the door, which is why it's so much darker.  I wanted to differentiate between inside and outside.

I achieved this effect by alternating washes, sanding slightly in between and using my wire brush several times.

Cracks and dings add interest.  I also wanted the kick board area to look really gross.  This is a well-used door!

The threshold is very worn, also.  I sanded it down quite a bit, so the curve (from thousands of footfalls) is quite obvious.  Here, I added a stronger ink wash to simulate really ground in dirt.

Not exactly a candidate for Good Housekeeping!

Are there any weathering techniques you especially like?

Tuesday, March 15, 2011

I Seem To Be...

I seem to be collecting quite a bit of furniture for a house I currently don't possess: a mid-1800's American farmhouse.  This last Sunday, my long-suffering husband and I visited the Handcrafters of Miniatures show in Dedham.  It was really fabulous.  These are smaller shows (there's one in March and one in November), but entirely worth the drive.  Indeed, some of my favorite artisans, including Bubba's Mini Country Cupboards and Marquis Miniatures make the trek.  Indeed, Barbara ("Bubba" herself) has been so kind as to supply me with several pieces for my as-yet nonexistent house.  Marquis Miniatures is a newer favorite, but Jill, the principal artisan behind the magic, does some truly fabulous work.

Like Barbara's, her work is largely geared toward the country house.

Perhaps this is telling me something.

I'd like to show you some of my pieces in situ, but, so far, there's no situs.  I've yet to find a farmhouse kit I really like.  Now, I'm certainly not opposed to designing my own, but, logistically, it's a huge problem to get the requisite pieces cut out.  Nobody does custom fabrication around here, on any scale.  So I'm probably looking for a kit-bash.

It's sort of a departure from my usual, but hey, it's nice to have a new project looming on the horizon...

My biggest issues with what's available are...

  1. Authenticity.  I'm looking for the kind of long narrow farmhouse that still covers northern New England.  Most so-called "farmhouses" are Victorian "farmhouse style" houses.
  2. Scale.  They're too square, too squat, and the ceilings are too low for the style of house.  Room height and size of room go hand in hand; 7' ceilings are really only appropriate in an early Colonial house.  Not to mention, a real farmer's porch is more than 3' deep.
  3. Layout.  Farmhouses didn't have small kitchens.  They did have entryways.  They did usually have sitting rooms, which doubled as work rooms, as well as formal front parlors for guests.
If anyone has any suggestions, let me know!

Friday, March 11, 2011

A Little Piece Of The Magic

I forget if I mentioned before, but I'm making a roombox for my husband. 

Although I'm making most of its components myself, a few will be contributed by other artisans.  The first, and in my opinion, most delightful of those components arrived yesterday.  Although I can't afford De Cave Designs' magical bookseller's shop, I can bring home a little piece of the magic in the form of a Louis XIV bookseller's table.  This sort of makes the room, with nothing else in it, doesn't it?

The room itself, architecturally, is Dutch, but we'll be filling it with an eclectic mix of French and American (and a few British!) pieces.

Doesn't it look great?

If you'd designed it for this space, it couldn't fit in better.

The finish on the table itself is really lovely.  I adore the burl effect.  The books themselves, too, are utterly charming.

One last look...