Preparing for the overhaul...
Showing posts with label tutorials. Show all posts

Wednesday, August 3, 2011

Stained Glass Window Print-Outs

If you're interested in creating windows similar to the ones in the tutorial, these are the patterns I used:


You can download the images, and size them to fit your window projects.  I hope this is helpful!  This latter design, for the diamond panes, is the same pattern I used for both the original diamond paned casement windows, and the windows on the Tudor Bakery.  I just resized it differently.

Wednesday, March 16, 2011

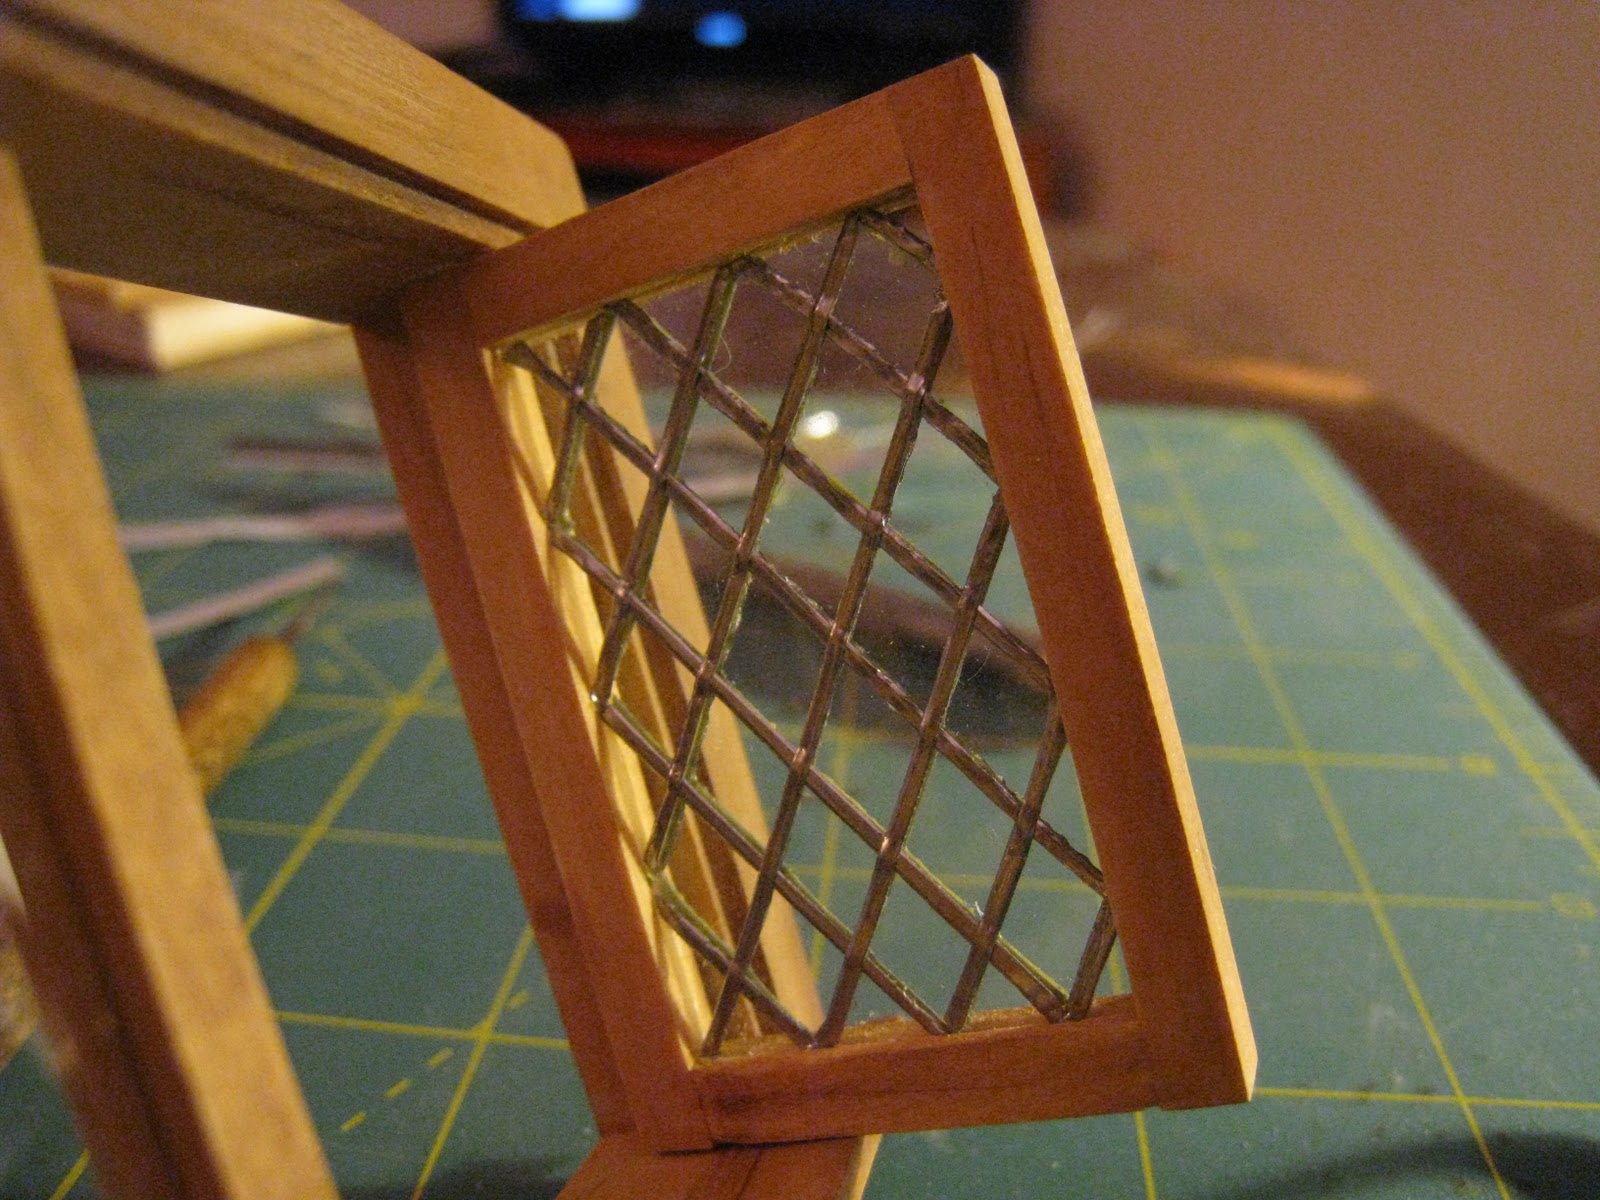
How To Make A Dollhouse Miniature Lead Paned Window

If you're interested in making the casement window itself, go here.  This is the second half of a tutorial on making really authentic dollhouse miniature windows.  I've been experimenting with this technique for a bit, and I think it works really well.  Windows have always been a thorn in my side; commercially available products just don't cut the mustard.  They usually aren't very well detailed, and take whatever project I'm working on completely out of scale.

Enter: lead tape.  Yes, the same stuff golfers use to weight their clubs.  You can get a roll of it online; I got mine on Amazon.  The other supplies you'll need are,
  1. A double-end ball stylus; I like the Kemper DBSS.  You can buy it here.  Kemper makes really nifty tools, and a decent stylus is a terrific investment.  It only costs three dollars!
  2. A paper pattern.  I got mine by trolling the internet for pictures of window patterns I liked, and then resizing it on my computer.  You can also draw your pattern freehand.
  3. DecoArt "Triple Thick" Brilliant Brush-On Gloss glaze.  You can buy this at Michael's (or any big box craft store).  I'm sure you can also find it online.  Trust me, it's worth searching out the right materials.  For clear, wavy panes--such as one finds in real old houses--this works the best.  I know; I've tried several different glazes.
  4. A self-healing cutting mat.
  5. A metal ruler.
  6. A really sharp x-acto knife.  I always buy extra blades every time I'm at the craft store.  They dull very quickly--especially when you're working with a difficult material like lead.
  7. A window!
And now...


The first step is to cut out the pattern so it exactly fits inside your window pane.

I copied several different patterns I liked.

Here, I've fitted the pattern inside.  It goes without saying that you should completely finish your window before moving on to this step!  This window, in case you're interested, is a casement window I purchased from Hobby Builders Supply.

This is lead tape.  It's real lead.  Be careful.  Your next step is to cut off a piece and, from that, cut off a very thin strip, about 1/32" thick.  The first few times you try this, it'll be pretty disheartening.  After you've practiced awhile, though, you'll find that the process gets much easier.  I cut my strips freehand.

Pull off the backing, and begin to lay the lead along the lines in the pattern.  Use your stylus to gently press it in place.  The tape has an adhesive backing, so it'll stay where you put it.

Here, I've laid a couple of strips.

It's slow going, but the learning curve is very steep.  Don't be discouraged!  You'll be making Tiffany-style windows in no time.

It's OK if the lines get a little messed; real lead paned windows weren't perfect, either.

Keep laying your strips...

Now, you get to start going the other way!

Using your stylus, press the crossed pieces together to form a joint.

Here's the first side completed!

And here it is without the pattern.

Now, flip it over and do the other side, matching the lines to each other as exactly as possible.  It really is very important to do both sides.  This is part of what creates such a level of realism.

Now, both sides are done.

Isn't it cool?

Occasionally, you'll look at your completed lead lights and something will seem out of place.  You can use your stylus to mush the lines around a little bit.  Make sure you're happy with how everything looks before you move on to the next step!

Now, do the other side.  I know, I know, snore.  But, really, it'll be so worth it in the end.  And, you know, if you find this really boring, it's a great way to keep your hands busy while watching TV, etc.

Now, all four sides are complete.

Almost done!

The window looks pretty good, but not great.  It won't be great until you glaze the panes.  In this tutorial, I'm just making very simple clear panes.  If anyone's interested, maybe later I can do a tutorial for stained glass?

I love this stuff.  Using a very small brush (I prefer a pointed tip), gently fill in each pane.  Go slowly and carefully, making sure the glaze touches each each edge completely.  Otherwise, the glaze has a tendency to pull away from the lead.

Here, the right side is done and the left side isn't.  I'm showing you the window like this for the purposes of contrast.  Glaze really does make a difference.

It's wavy, just like real (antique) glass.

I like the way the light streams through.

And there you have it: the beginning steps.  Of course, you'll want to glaze both sides, front and back.  Then, let your window dry completely--ideally a full 24 hours.  I like to do the front, then let it dry overnight before flipping it over to do the back, and then waiting another day before installing the window.

What do you think?

Tuesday, March 8, 2011

How To Make A Really Good Dollhouse Floor

The woodwork can make or break a dollhouse.  It's the things we don't really think about, or notice--floors, columns, door frames, etc--that give it that "real house" feel.  They're the canvas on which we "paint" the rest of the scene.  Unfortunately, they're also the parts we tend to want to rush through--at least, I do.  I've developed the techniques I use through years of trial and error, and the (repeated) experience of being really unhappy with my results.  I tend to slap on a coat or two of stain, a coat or two of varnish, and throw in a few passes with a sanding sponge.  If it's smooth and pretty looking, I conclude I'm done...and then I look at the final product and wonder what went wrong.

This dissatisfaction has led me to developing a few new techniques, which I'll share with you.

You'll need:
  1. 3 colors of water based acrylic craft paint.  If you want to replicate the exact look I've created here, use "Americana" brand paint in Dark Chocolate, Lamp (Ebony) Black, and Honey Brown.  Dark Chocolate forms the base color, Lamp Black the lowlights, and Honey Brown--which is really more of a light mustard--forms the highlights.
  2. A soft brush for brushing away excess dust; I use a 1" or 2" soft bristled trim brush.
  3. Sanding sponges.  I like 3M brand sanding sponges in "medium" grit.  Keep in mind, you want a rougher surface, to really scratch up the floor.
  4. An x-acto knife.
  5. "Roughing" tools.  I like small stripping brushes, which are available at Home Depot.  You can also use one of the wire brushes that comes in a standard golf kit.  They're very cheap, and a great tool to have on hand.


This is the Tudor Bakery floor, only there's no floor yet.

I like to apply my wallpaper before I lay my floor, but everyone's different.

Here, I'm using 1" pine strips.  They have a very interesting grain, which I like.  But, you can use any thin strip.  I'd stay away from lime (basswood), if at all possible, only because it's very soft and can dent. Lime is more suitable for columns, trim, etc, because these are lower-wear surfaces.

I like to dry-fit the entire floor before I start gluing anything down.  This way, I can get a sense of how everything fits together, and what the trouble spots are.  Sometimes, no matter how careful you are, your room ends up a few degrees off square.  Even one degree can make a big difference, and if you dry fit your floor, it's easier to figure out how to compensate for any problems--and make it as non-obvious as possible.

Make sure everything lines up as exactly as possible along the front.

Here, I'm working around the chimney column.  Once I cut all the boards, I glued them down in sections using Quick Grip.  Silicone-based adhesives work best, as they tend to cause the least warp.  Water-based glues (like craft glue) tend to produce a lot of warp.  Even so, make sure you glue the boards down in small batches (no more than 3 or 4 strips at a time), and weight them down while drying (for at least 20 minutes) to prevent warp.

The hole in the center is for tiles, which I'll install later.  Once everything's dry, paint the floor with diluted Dark Chocolate (or whatever your base color is) paint.  I tend not to sand beforehand, as there's little point; the moisture in the paint raises the grain.  I wanted a very deep color brown, so I applied two coats of paint, and then sanded with my sanding sponge.

Here's a close-up of the floor, after it's been sanded.  If you really want the grain to stand out, you can put a coat of water-based matte varnish on between coats of paint.  Make sure you sand the varnish well, before you put on a second coat of paint!

Here's the floor.  So far, I've put on one coat of paint, a coat of varnish, sanded, put on another coat of paint, and another coat of varnish, and sanded.  Don't be afraid to go nuts with the sanding sponge.

Now it's time for the fun part.  I used my tools to rough up the floor.  Whenever you think you've done enough, don't be afraid to do a little more!

See all that dust?  This is where a brush comes in handy!  You want all this gunk gone before you start aging the surface with paint.

A close-up of the floor.  Those scores and scratches were created by my x-acto blade, and my stripping brush.  I created lighter spots with my sanding sponge, by sanding some areas slightly more thoroughly than others.

Now, I'm ready to start aging with paint!

I diluted my darkest color (Lamp Black), and began working it in to the corners, and the centers of the boards.  I made a particular effort to work the color into the deeper knife scores I'd made.  Only place lowlights where it makes sense: in corners, dark crevasses, etc.

A close-up of the lowlights.  The key to success, with this effect, is subtlety.  You don't want to end up with tiger stripes!  "Barely there" is where it's at.

Here, I've completed the lowlights.

Here's a close-up of the lowlights.

Now, it's time for the highlights.  I made a wash of Honey Brown and water, mixing in just enough paint so that my mixture was watery, but still opaque.  Then, I painted it on, let it sit for a minute, and rubbed it off.  So I could keep the overall effect even, I applied the wash in sections.  I didn't want the paint drying before I had a chance to rub it off.

Here's a close-up of the finished floor.  It's a very subtle effect.  I like the mixture of the Dark Chocolate and the Honey Brown, because it gives a very rich, warm effect.  A lot of paints called "Burnt Umber", and other paints in that general range, are very ashy looking when dry.  Likewise, a lot of lighter value paints end up looking bright orange.

One final close-up.

So what do you think?  Any floor (or other woodwork) finishing techniques you'd like to share?

Thursday, March 3, 2011

How To Make A Really Authentic Dollhouse Miniature Thatched Roof

Warning: this tutorial isn't for sissies.  It's a little bit tedious, and a little bit difficult, and very messy.  Be prepared to look like one of Hagrid's creatures has shed all over you.

However, the results are completely, 100% worth it.  If you're like me, you love the look of a thatched roof, but have been disappointed with conventional attempts at reproducing one in miniature.  So, although this tutorial isn't the quickest, or easiest, it represents literally months' worth of experimentation.  I've been at this, off and on, since I was a little girl.  A few of my most recent attempts--which led directly to the creation of this tutorial--ended in disaster.  One ended with a piece of faux fur more or less permanently affixed to my left hand.  I'm saving you that pain and frustration!

Another way in which this tutorial is different is, my husband helped create it.  Several of the ideas and techniques are his.  He and I produced the Wizard's Eyrie roof together, over the period of a few days.  We started it one night, and finished it the next.

You will need:
  1. Faux fur.  Get more than you think you'll need, to allow for mistakes.  I purchased my faux fur on Fabric.com.  If you're interested in reproducing this look exactly, my specific order was for "dyed fox gold" fur.  But, really, almost any faux fur will do.  Remember, real thatched roof houses vary dramatically.  Individuality is encouraged!
  2. Some wood for the end cap.  I purchased scalloped gingerbread trim from Miniatures.com, and added a second piece of 1" wide trim to it, to create a deeper piece of trim.  But, you can use whatever you like.
  3. Epoxy; I favor Quick Grip, but, again, you can use whatever you like.  
  4. Matte varnish.  It's really important, here, that the varnish be matte.  Satin and semi-gloss won't cut it.
  5. A hair or beard trimmer.
  6. Sharp scissors.  In fact, I'd seriously consider buying a new pair just for this project--and keeping them to use exclusively for fabric.  Here, I used two pairs of scissors (both Fiskars brand; that's my personal favorite): a pair of regular scissors, and a pair of smaller, very dainty pinking shears.  I bought both at the local craft store.
Here's a picture of a real thatched roof cottage for reference.

The first step is to make your ridge cap.  I like to make the individual trim pieces first, and then glue them together while they're placed against the roof.  That way, I can make sure that the angle of the ridge cap, and the angle of the roofline, are the same angle.  Here, I just glued two pieces end to end.  Then, after they dried, I added two little triangles, one on each side, capping it off.

NOTE: remember to leave about 1/4" of extra space!!!  You want the ridge cap just about 1/4" LONGER than the actual roofline.  This is because you'll need that extra space later--it'll be filled with fur!

Now, cut a piece of faux fur slightly larger than necessary to completely cover the outside of the ridge cap.

Now, start shaving it.  This step was actually my husband's idea.  At first, I was extremely dubious.  After I started trying to shave the fur, I got even more dubious.  Even worse, we'd actually bought this shaving contraption especially for the purpose.  I discovered, after awhile, that the secret to successful fur shaving is to use a light hand on the shaver.  Don't press down; glide forward.

My husband said, at this point, that it looked like the binding of Hagrid's Monster Book of Monsters.

A few passes later (well, actually, more than a few) and it looked more like, you know, a shaved pelt.  For awhile there, I was really despairing--it looked like something with horrible mange.  So, if and when this happens to you, don't despair!

Patience makes perfect.  Here, we're simulating a real ridge cap, which was usually made of very tough fibers bound together, and shorn.  You can see the texture difference between the ridge cap and the actual thatch in the sample photo.

Now, very carefully trace the shape of the ridge cap--not forgetting the ends--onto the back of your newly shorn pelt.  Be careful, though, to leave at least 1/2" of extra material on each end.

The end cap.

Here I am, gluing it on.

Now, start cutting out the actual ridge cap piece.  I generally cut along the outside of my lines; I want to make sure I have complete coverage.  Owing to the direction of the fabric--faux fur always "grows" in a specific direction--one side will be furrier and more indistinct than the other.  You can solve the problem (again, this was my husband's inspiration) by using a very fine pair of pinking shears to cut away any excess.  Use a light hand, here...and plenty of patience!

I actually recommend holding off on this step until after you've glued your shorn pelt onto the ridge cap. I just wanted to show you, now, so you'd see that I wasn't going to leave it looking this way.  But, onward and upward...

Here, I've glued my shorn pelt onto the ridge cap--and, as you can see, left just about 1" of extra fabric on either side.

Here it is, hanging off.  The reason I like to cut the edges after I glue the fabric on is to prevent gaps--and to make sure I get rid of that awful white sew line.  I used my pinking shears (there they are, sitting on the table) to very slowly and carefully trim away the extra fabric.

NOTE: it's important, here, to cut on an angle.  I cut angling down toward the backside of the fabric, so there's more of a fur overhang left.  It's easier, then, to disguise the fact that it's fabric, and not thatch.

If there are gaps--and there will be--you can cover them by running a bead of craft glue around the apex of the corner, and stuffing in a few extra shreds of shorn pelt.  That's what I did, here.  If you enlarge the picture (click on any of these pictures to see a larger version), you can see what I mean a little better.  This isn't, like, the most sturdy solution, but it doesn't matter--later on, you'll be gluing this piece into place and varnishing it.

Here's the (almost) finished ridge cap.

Here's a close-up of the (almost) finished ridge cap.

Isn't it cute?

Here, I'm testing it on the roof, with the fabric (it's not cut yet; it's just hanging there), to make sure everything fits.

Right now, everything's just being "dry fitted", as it were.

As you can see, the wood is still faintly visible--and that's no good.

So, pick up some appropriately colored water-based paint, and touch it up!

Here it is, all touched up.

Now, you're done with the end cap!  Hallelujah!  On to the actual roof...

Make a pattern, and make sure that pattern takes into account the width of the actual roof piece.  When we glue the fur on, we'll wrap it around the sides.  Remember, you can always trim away--but it's hard to add back on!

When you're cutting the fabric piece out, make sure, once again, that you cut on an angle.  See how there's a huge overhang along the bottom?  It's a little tricky to cut things out this way, yes, but the results are absolutely worth it.  The more care you take now, cutting out these pieces, the more natural your finished piece will look.

Here I am, dry fitting the pieces.

I very carefully trim away any excess, so the overhang is even.  Remember, though, that thatch is a natural product, and thatched roofs are never "perfect".  That's part of their charm!

You might want to use a straight edge--here, I'm using the pattern piece--to help you.

Very, very gently comb your fingers along the edges, and down the front, of each piece.  You won't believe how much extra fur comes off--or how much you already have all over you, your work surface, and everything you've touched.  This stuff sheds like crazy!

Now, using your trusty Quick Grip, glue both pieces in place.

See how the edges fold down to wrap the sides of the roof panels?

Press gently, but firmly.

Here I am, still pulling off excess fur!

Now, glue on the ridge cap...and breathe a sigh of relief!  The hard part is behind you!  The rest of this project is really just a bad case of hurry up and wait.

Here we are--almost there!

Here's another close-up.  It looks good, but not great.  Additionally, it's not very sturdy.  Which means it's time for...

Varnish!  You'll use a lot of this stuff, way more than you think, so make sure you have plenty.  I like Delta products: they're cheap, and they work.  Whatever you use, though, make sure it's water based.

Start varnishing.  I like to start on the edges, work across the ridge line, and then work my way down toward the front.  In my experience, this sequence produces the most natural results.

Here, I'm using my brush to "ruck up" the ridge cap a bit.

Now, we're going to shape the bottom of the roof.  Make sure there's plenty of varnish along the bottom. You don't want it dripping, but you do want it fairly saturated.  Keep in mind, though, that the varnish--no matter how much you apply--won't penetrate down to the undercoat, and that's OK; you don't want it to.  The fact that there's still movement and bounce under the dried varnish is part of what makes this roof look so realistic.

Take a straight piece of wood, wrap it in Reynolds Wrap, and use clamps to hold it in place.  Basically, you want the furry ends to dry in a curved shape.  Or, if you're going for a really bohemian look, you can leave them hanging down.

This is what I'm talking about.

A close-up of the drying fur.

Don't worry about the ends sticking out; you can glue them into place, or trim them, after your roof is completely dry.

Make sure, too, that you like the way your roof looks before it dries.  If there are hairs out of place, now's the time to smooth them down--or you'll be stuck with them forever.  At the same time, though, you don't want your piece looking overworked.  Remember, we're simulating natural material.

Now, leave it to dry, ideally overnight.  "Dry to the touch" and "really dry" aren't the same thing.  Especially if you want your thatch to hold its shape, it's really vital that you leave it alone for as long as possible.

I let this dry, while I worked on the Tudor Bakery.

A close-up of the ridge cap.

Another close-up of the ridge cap, this one with some thatch included.

Then, after 12 to 24 hours have passed, it's time to remove the drying supports.  Be gentle with this step! It won't be terribly easy--expect a little pull--but the Reynolds Wrap should remove with a little coaxing. Then...

You're done!!!

Here it is!  I glued the pokey-outy edges carefully back into place.  You can, if you want to...or you can leave them.  It's really up to you (and your doll's skill as a thatcher!)

A close-up of the ridge cap.

I haven't done the roof of the lean-to yet, because I haven't bricked the chimney yet.  I got an email from Richard Stacey a few days ago, informing me that my order is delayed, on account of their need to make more corner slips.  However, once I've had a chance to brick the chimney, I'll "thatch" the lean-to the same way.

What do you think?

I, personally, like the turned-under edges, although a more bohemian look would work well, too.

I especially like how the matte varnish helps the fur catch the light.

A close-up of the underside.

So there you have it: a really authentic dollhouse miniature thatched roof.  I've tried a lot of techniques, and this is my favorite.  What do you think?