So as I'm sure you're aware, I've had a few snow days recently...which have provided the perfect opportunity to create. I'm almost done with the first phase of the outside--the only real woodworking I have left is the top of the chimney. Right now, it's just a blank column. Eventually, I'll stain the wood, and apply the stucco. Then, really eventually, I'll clad the lower half of the house, and all the various ovens, etc with wonderful Richard Stacey products...
But this is what I've done so far.
Click on any picture to see it larger.
I imagine my bakery being on a corner, so there are really two "fronts". This is one. Customers can enter the courtyard by the gate, to use the public ovens. It was fairly common, in medieval and tudor times, when chimneys were expensive to build, for householders to trek their baked goods to the bakery for baking.
A close-up of the half timbering. To me, the biggest challenge, and also the biggest fun of creating a half timbered house is designing the pattern. It's easy to get carried away, though--the upper story of this house has well over 500 individually machined pieces.
A close up of the public ovens.
The back of the bakery.
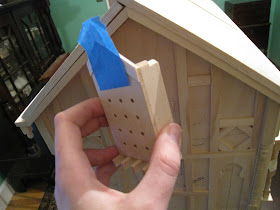
The dovecote, for now, is removable (since I'm planning on painting it a different color). Doves (pigeons) were a medieval and tudor staple food. They were easy and cheap to keep, so many homes encouraged them into the eaves. As anyone who's ever lived in a city knows, pigeons are also extremely stupid, and thus easy to catch.
A close-up of the corbels.
I've just begun working on the inside.
The other "front". Eventually, a bakery sign will hang down over the vending window, where passersby can see it easily. Since most people were illiterate, signs almost always took pictoral form. I've revamped the design of the vending window since I last posted; now, half folds down to form a counter, and half folds up to form an awning. I thought it made more sense to have a shallower counter; it'd be easier for customers to reach across.
A close-up of the half timbering and eaves.
The house, from a distance. It's not there yet, but it's getting there. Once I've finished the woodworking portion of the event, I'll start staining and painting.
When it comes to half timbering a dollhouse, there's a couple different schools of thought. Personally, I prefer to design the entire structure, before starting to cut individual pieces. I then glue everything onto the face of the dollhouse, and sand, stain, and varnish it in situ. I don't add stucco until after everything's completely finished. Personally, I think this sequence gives very realistic results. It's basically how real medieval and tudor houses were built.
Most medieval burglars eschewed the front door, instead cutting through the walls with saws. It was much quieter, and easier, than breaking down a door or picking a challenging lock. Although thick, the walls were, often, quite flimsy. Wattle and daub had its limitations. This is why many houses tended to have stone or, sometimes, less commonly, brick ground floors. Such a design gave the homeowner much greater security.
So, what does everyone think so far?


Wow CJ that is an amazing doll house! You are seriously talented! How long has it taken you to do that? It looks like so much work! Do you have to make all these pieces, or do they come predesigned? I wouldn't even know where to begin! It is going to look fantastic I'm sure. I read your other blog the other day about the prolife, I can't believe how much you seem to get done! I can barely keep up with taking care of the baby, dishes and showering!!
ReplyDeleteKristina
Kristina, you are way too flattering :-) I hand machined each piece individually...and it took days. But, keep in mind, I've been snowed in with not a whole lot else to do ;-)
ReplyDelete